Experimenting with Voicenotes integration into Obsidian blog
Note: Originally posted on my Voicenotes Page.
I’m using the unofficial Voicenotes plugin in Obsidian and I have it set to download everything. Not only the text but also the audio, the attachments, everything. I even have some properties that will capture links, the title, and a lot of other information.
So, I’m here thinking that maybe it is possible to create a copy of this post—that I’m adding to Voicenotes Pages—in my Obsidian blog.
Well, it’s not “maybe”, it is indeed possible because, ultimately, it’s also being created as an Obsidian note. All I have to do is set the plugin’s template to download the post and everything else but with the appropriate properties, the ones that I use to publish on Obsidian Publish.
Hmm, this is an interesting experiment. Let’s see how it goes.
AI as a powerful Tool, not a Commander.
It’s tempting to outsource more and more tasks to powerful AI tools. But how far should we go? Have we already reached a point where we’re blindly handing over too much control? And what harm is this already doing to our growth and critical thinking?
In a recent post, I discussed keeping AI siloed, and here’s an example of what I meant. When I’m with a client, I take notes while we’re talking. This helps me better process everything and puts my brain into an intentional mode. Which, in turn, helps me come up with important questions to ask in real time and also triggers ideas for solutions to their workflow.
Even so, sometimes real-time note-taking isn’t possible. For instance, the other day, when I was helping an independent professional, I was demonstrating how to use the Timeline System to build his workflow by sharing my Supernote screen. In other words, I didn’t have enough hands to type.
However, right after the meeting, I opened Voicenotes, pressed record, and started speaking as if I were typing in real time. If I can’t take notes during a meeting, I make sure to do it immediately afterward to avoid forgetting any essential details. After all, that’s the whole point of taking notes.
I usually write everything out, even if it’s after the fact. But, in this particular case, I had another appointment, and, as I said, I would rather not forget anything. (By the way, any similar application would have worked; I chose Voicenotes because it has a web app.)
After finishing the recording, I went to the web, copied the transcription, and pasted it into the client’s note in Obsidian. There, I fixed the mistakes and added additional details, which ultimately triggered new ideas, also noted down to be shared with the client in the next session.
Yes, I can hear you! Here’s why I haven’t used AI to do everything.
Imagine asking AI to create all the topics for a specific meeting. Then, it emails all participants who, during the meeting, used AI to record and summarize it. Each attendee then asks AI to generate suggestions. Finally, someone consolidates all the suggestions in another AI and asks it to create a plan of action.
You’ve probably seen jokes about this online, but is it that far from reality? If you are afraid of AI taking your job, at least stop helping it by handing everything over on a silver platter.
I know, we’ve passed the point where not using AI is possible. It’s challenging to avoid something that’s excellent for many tasks. However, I strongly believe it is a terrible idea to put it in control. If I had used AI to record, transcribe, and summarize everything, I would never have had the insights, which, in the end, would have made taking the meeting notes pointless.
I created my own AI, but it is not what you are thinking.
As I’ve said many other times, I believe there are some technologies that reached a stage of maturity where they could just be used indefinitely. What many people seem not to know is that it’s possible to go back to enjoying that sweet spot.
If we look back a few decades, it feels like things eventually got out of control. I remember using the iPhone when information and even the OS upgrades were done by connecting the phone to a computer. Back then, apps with online synchronization like Evernote were rare.
At some point, everything started becoming so fast and instantaneous. Not only messages, but almost everything. I’m not old enough to remember when breaking news used to be the next day’s newspaper cover. But before the popularization of the Internet, I remember the We interrupt this program for a special news bulletin message on the TV and radio. Now, we get flooded by information about everything all the time. Many times inaccurate or, worse, fake news.
If we stop to think about it, unless you are a reporter, stock trader, or work with anything that is time-sensitive, there’s no practical use for all this immediacy. On the contrary, it generates a lot of stress. As ordinary people, there’s absolutely nothing practical we’ll be able to do with most of the instant information we get bombarded with.
The most recent I-must-be-part-of-it-no-matter-what fad is AI. There’s no reason to use AI for everything, nor is there a need for AI in every single app. Also, just so you know, yes, I do use AI. Every day! But I try to keep it siloed.
Back to my point. Although using or repurposing old tech was something I always did, it feels like I’m doing it more and more these days. I don’t know if it’s because I’m getting older or because I refuse to subject myself to imposed anxiety.
For example, I did try streaming for a while but |never stopped using my iPod 5.5 Gen. The modern Supernote I use and love is constantly bringing me back to a pleasant time when I used my Palm for everything. You’re probably aware of my Digital Caveman project. And there are all those apps, like Instapaper, that look and work just like they did a billion years ago. All these are great examples of the point of ‘tech maturity’ I mentioned at the beginning.
Anyway, the more I look at modernity from the perspective of people who are constantly anxious and chasing novelty just for novelty’s sake, the more I think of products and services I should have never stopped using. The good news is that many of them still exist, and after going back to using some of them, I can now clearly see how good they really are, as they have withstood the test of time.
Maybe that’s why I related so much to Kevin Kelly’s What Technology Wants book. Not only does he directly challenge the common perception that old technologies become obsolete and vanish, but he comes up with several examples of technologies, no matter how old, that still exist somewhere. Perhaps in a modified form, for a specific purpose, or in a niche market.
Of course, using old tech or new tech with old tech vibes, like Obsidian, comes with its challenges. It often demands what I call Attention & Intention, my kind of ‘AI’. For example, I see people complaining all the time about how complicated Obsidian is. It’s difficult to disagree with that, but doing things with Attention & Intention means that you were paying attention and will probably remember where you stored that information.
I’m not going to pretend I didn’t fall for modern tech promises, like social media. Thankfully, many years ago I started disconnecting from all those toxic spaces, and recently, I’m finding that going [[vladcampos.com/Timeline/Blog/2025/2025-06-28 • A few cool things I recently discovered about RSS feeds. Spoiler — they have super-powers.|back to using RSS]] to follow blogs is bringing me a lot of joy. I don’t have words to describe how pleasant it is to read like this. I’m overwhelmed by how much great content I was missing.
Of course, it’s not as simple or easy as the infinite scroll provided by a mysterious algorithm with a single mission: keep you hooked, no matter what. No matter what! It comes slowly from here and there: from a conversation you had on Mastodon, a page that appeared in a search result, and even trying to remember the names of the websites of those old friends. But since it’s all done with Attention & Intention, it pays off.
It’s true for all the other non-anxious tech I mentioned above. Adding music to an iPod means connecting it to a computer. To find music, you have to know at least a few things about it, like its name, or the singer, or album, etc. As for the Supernote, it has a simple OS running on a basic device with a monochromatic display. No browser, no notifications, and disconnected most of the time, much like my Palm used to be. And let’s not even start with all the effort one has to put into an Obsidian Vault.
Next in my wishlist of mindful devices is a Fairphone, most likely running /e/OS.
Attention & Intention is beautiful, pleasant, and, most importantly, relaxing.
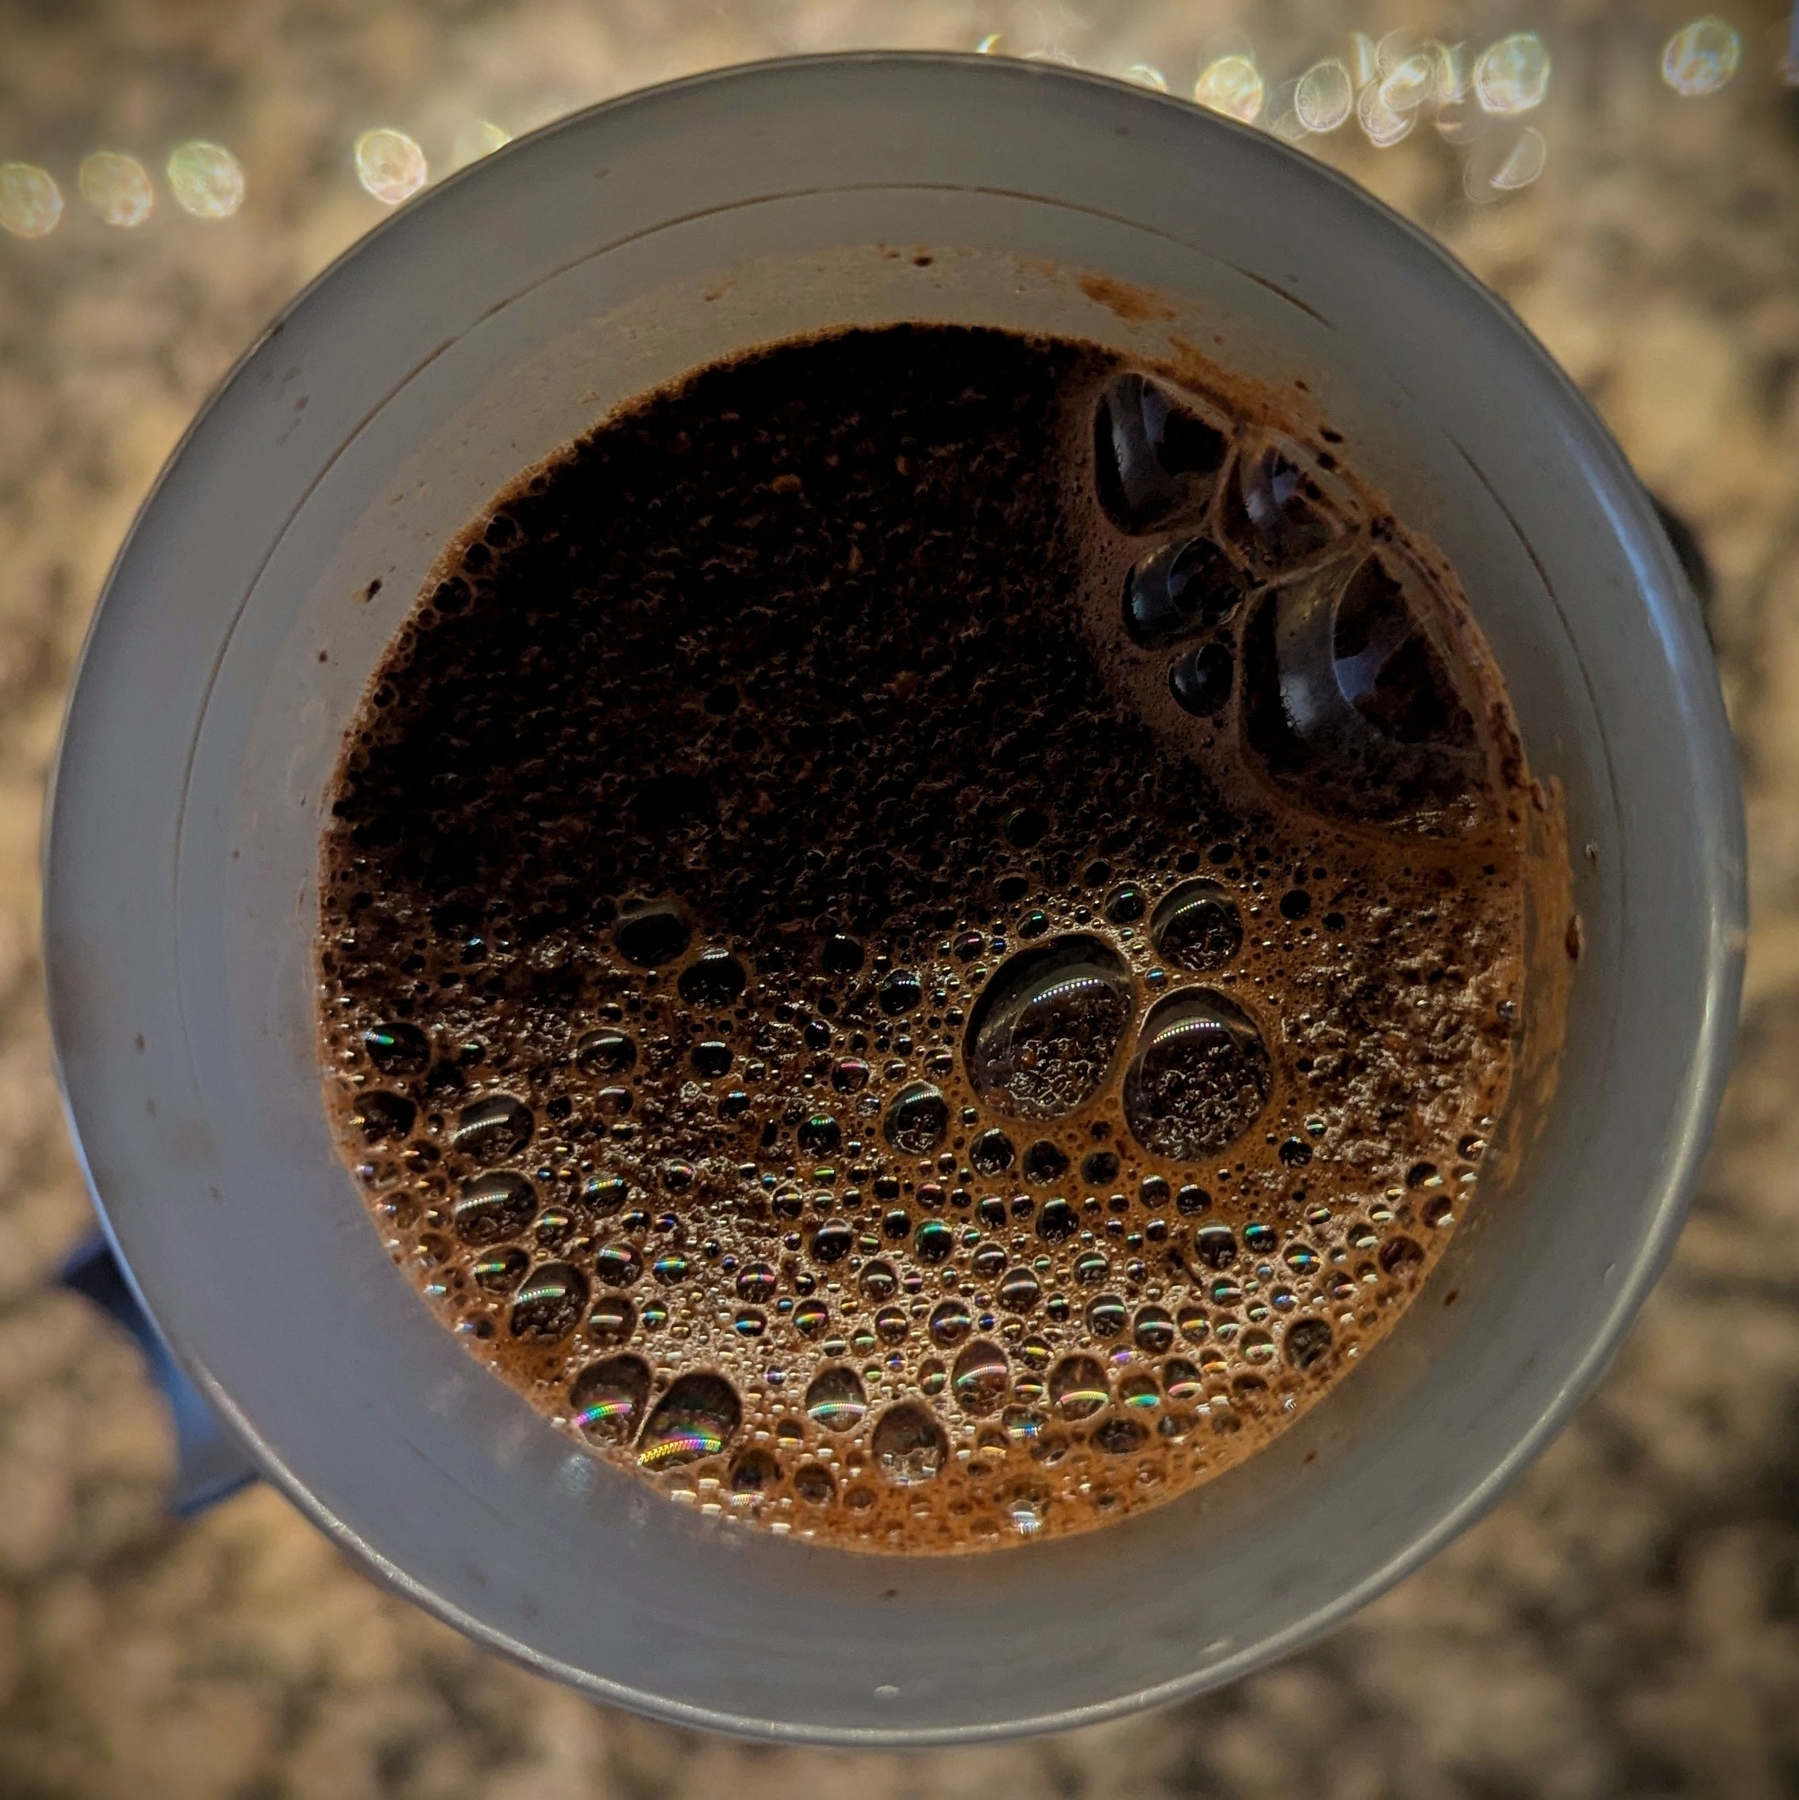
Good morning, coffee friends
Following the pre-wetting of the filter with hot water, I add the coffee and pour water over it. What you see in the picture is a top-down view of an AeroPress at that stage.
Now it’s time to add the plunger, wait a few seconds, and, finally, press. I love to cook, by the way, but I really do follow recipes to the letter. Time and quantity are frequently eyeballed.
A few cool things I recently discovered about RSS feeds. Spoiler — they have super-powers.
It feels more like a niche thing these days, but RSS is still a powerful tool.
Even if you don’t know what RSS is, chances are you have it on your blog. What you may not know is how it can help you set up a newsletter and automatically share your blog posts on social media, among other things. Is it worth it? Well, I tried some ideas, and I have a few thoughts to share with you.
Where is my RSS?
This will depend on the platform you are using, but it’s usually something like your-domain.com/rss or your-domain.com/feed. If you don’t see a page like that when you try those addresses on your domain, check your website provider’s help page or search for it on Google. And if you are an Obsidian Publish user, unfortunately all I can offer you is a workaround.
With your RSS feed in hand, we can now work on some integrations.
Mastodon
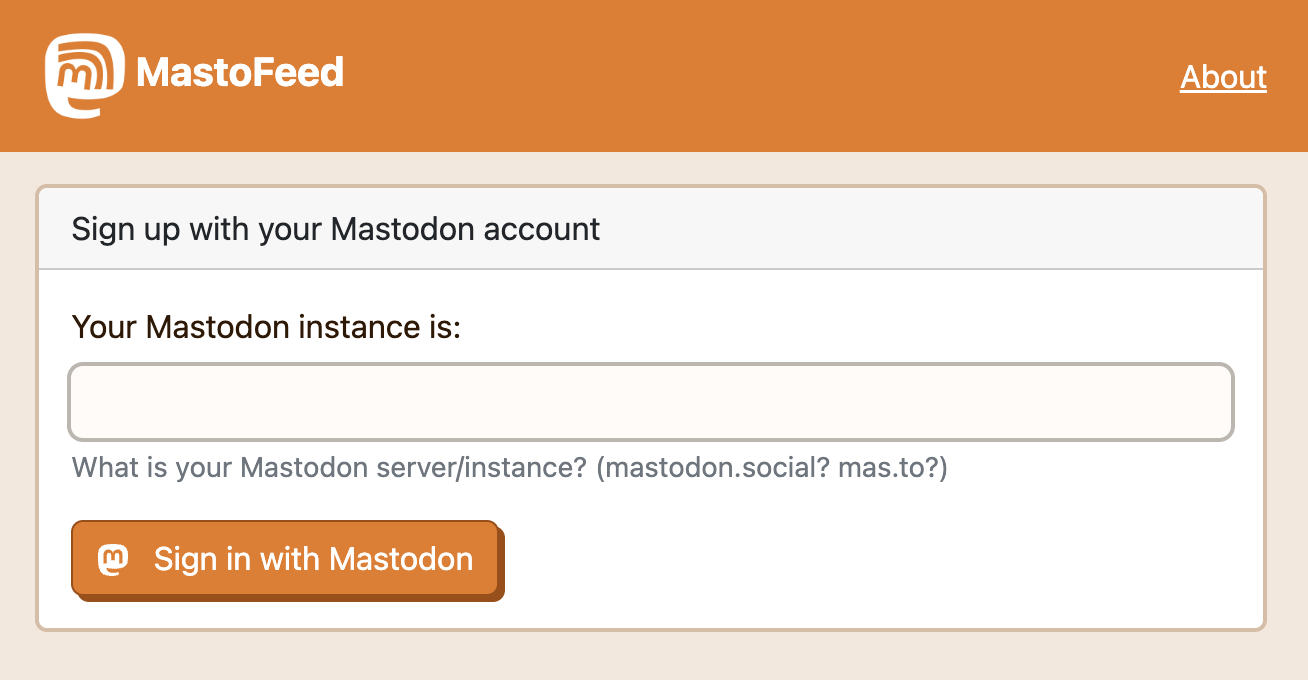
MastoFeed is a pretty cool service I recently discovered. It automatically composes Mastodon posts based on new items that pop up in your RSS feed. To set it up, go to mastofeed.org and log in with your Mastodon account.
Next, click on the “Add Feed” button, paste your RSS feed address, and add it. Finally, click on “Activate” to have access to some settings.
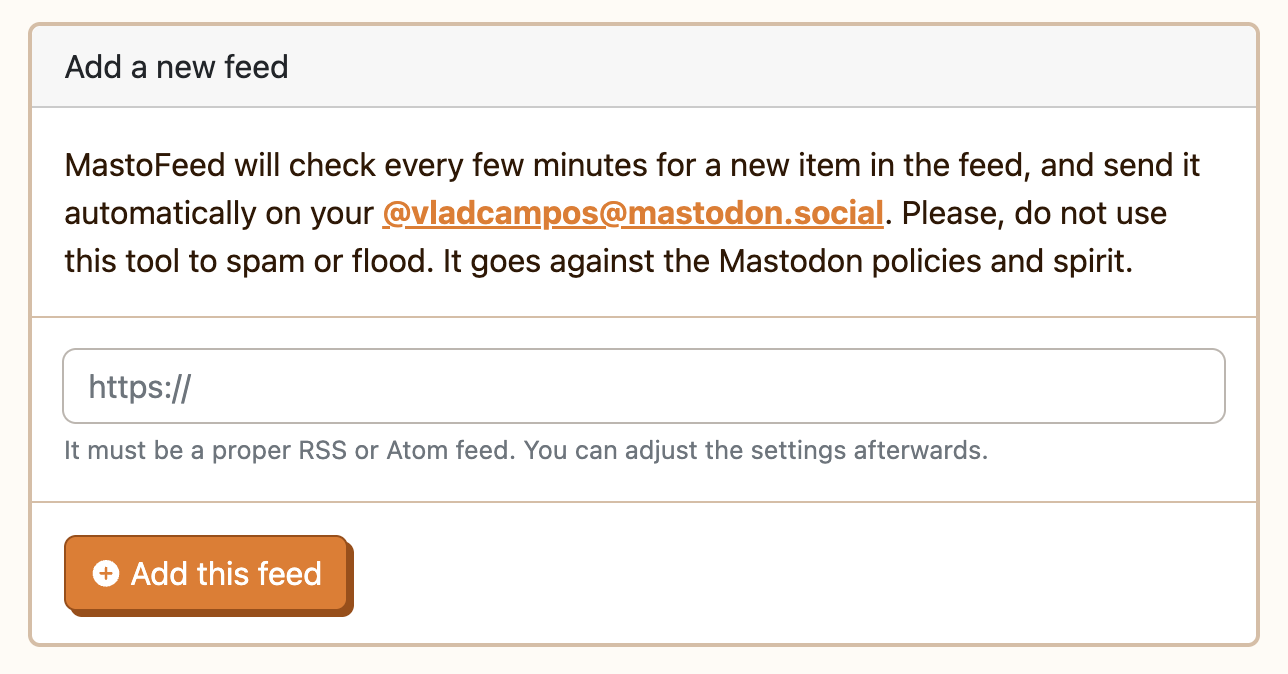
The box below “Format of the message” is where you can use the variables provided to format the final post. For example, I used:
(TITLE) • (SUMMARY): (LINK)
Below you can see an image of a recent post.
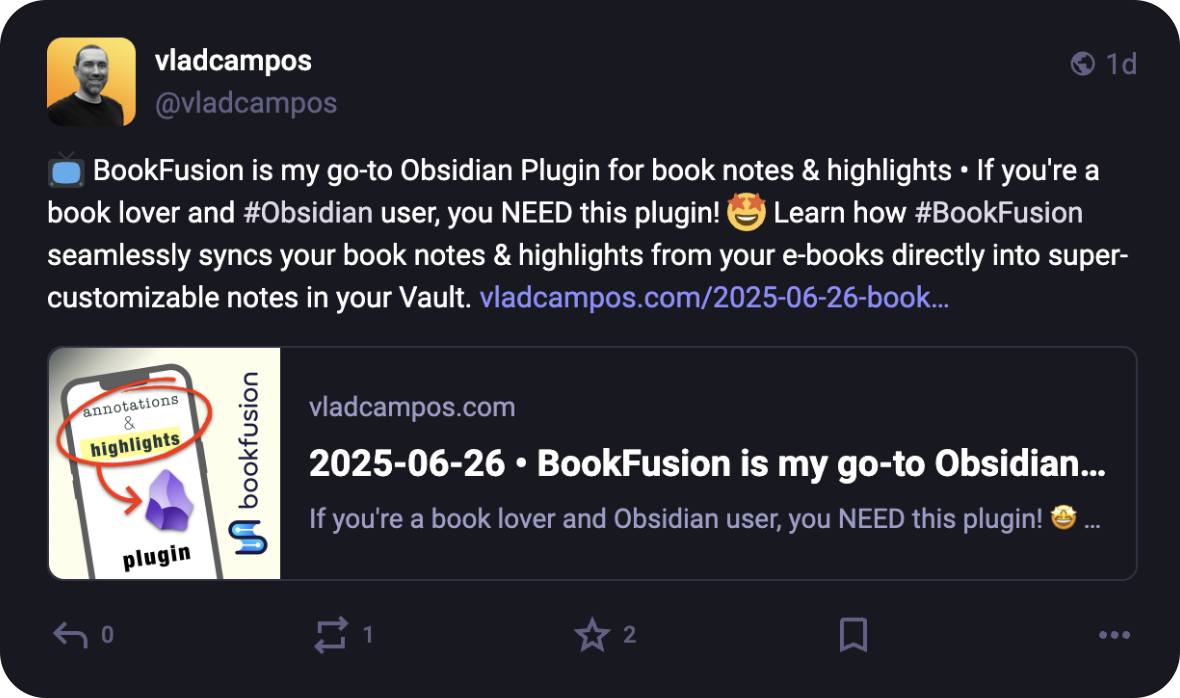
However, despite enjoying all the customizations and how good the final post looks, MastoFeed was taking many hours — around 5–7 — to create the new posts. I understand that it is a free service and all the associated costs, but it is too much, especially when I want to share timely news or a recent thought.
I’m now exploring Zapier and similar services to try doing the same in less time. And I can easily do that because I’m basing the automation on RSS.
Newsletter
This is another automation I only recently found out was possible. It is usually part of a paid plan, but many newsletter providers will allow you to use your RSS feed as a trigger to send emails. And that blew my mind.
I spent most of my time experimenting with two services: Brevo and Kit. Both have very detailed explanations on how to set up your RSS, so I’m not reposting that information here. And as you can customize everything, the final result is something pretty cool. But, yet again, I gave up on the automation.
I’m still using RSS to populate the core of my weekly newsletter, but if you are a subscriber, you know that I like to start the email with a personal touch. It’s just a paragraph or two, but I like to do that, as it makes me feel more connected to the reader.
Final Thoughts
If you keep a blog and haven’t yet checked RSS’s extra powers, I strongly suggest you explore this vein. Trust me, you’ll find uses that go way beyond a passive sharing of your posts.
I started typing “what time…” on Google to find out when a store I want to go to opens, and “what time is it” was the first search suggestion in the list. Seriously? It is highly probable that people would be typing that into a computer or phone. The time is already there, right in front of them! 😳 Sometimes, modern life scares me.
🤎 Every morning, I’m inundated by an immense sense of joy as I open Mastodon and enjoy a cup of coffee while looking at the posts tagged with the #coffee hashtag. It is like having a cup of coffee with friends from all over the world.
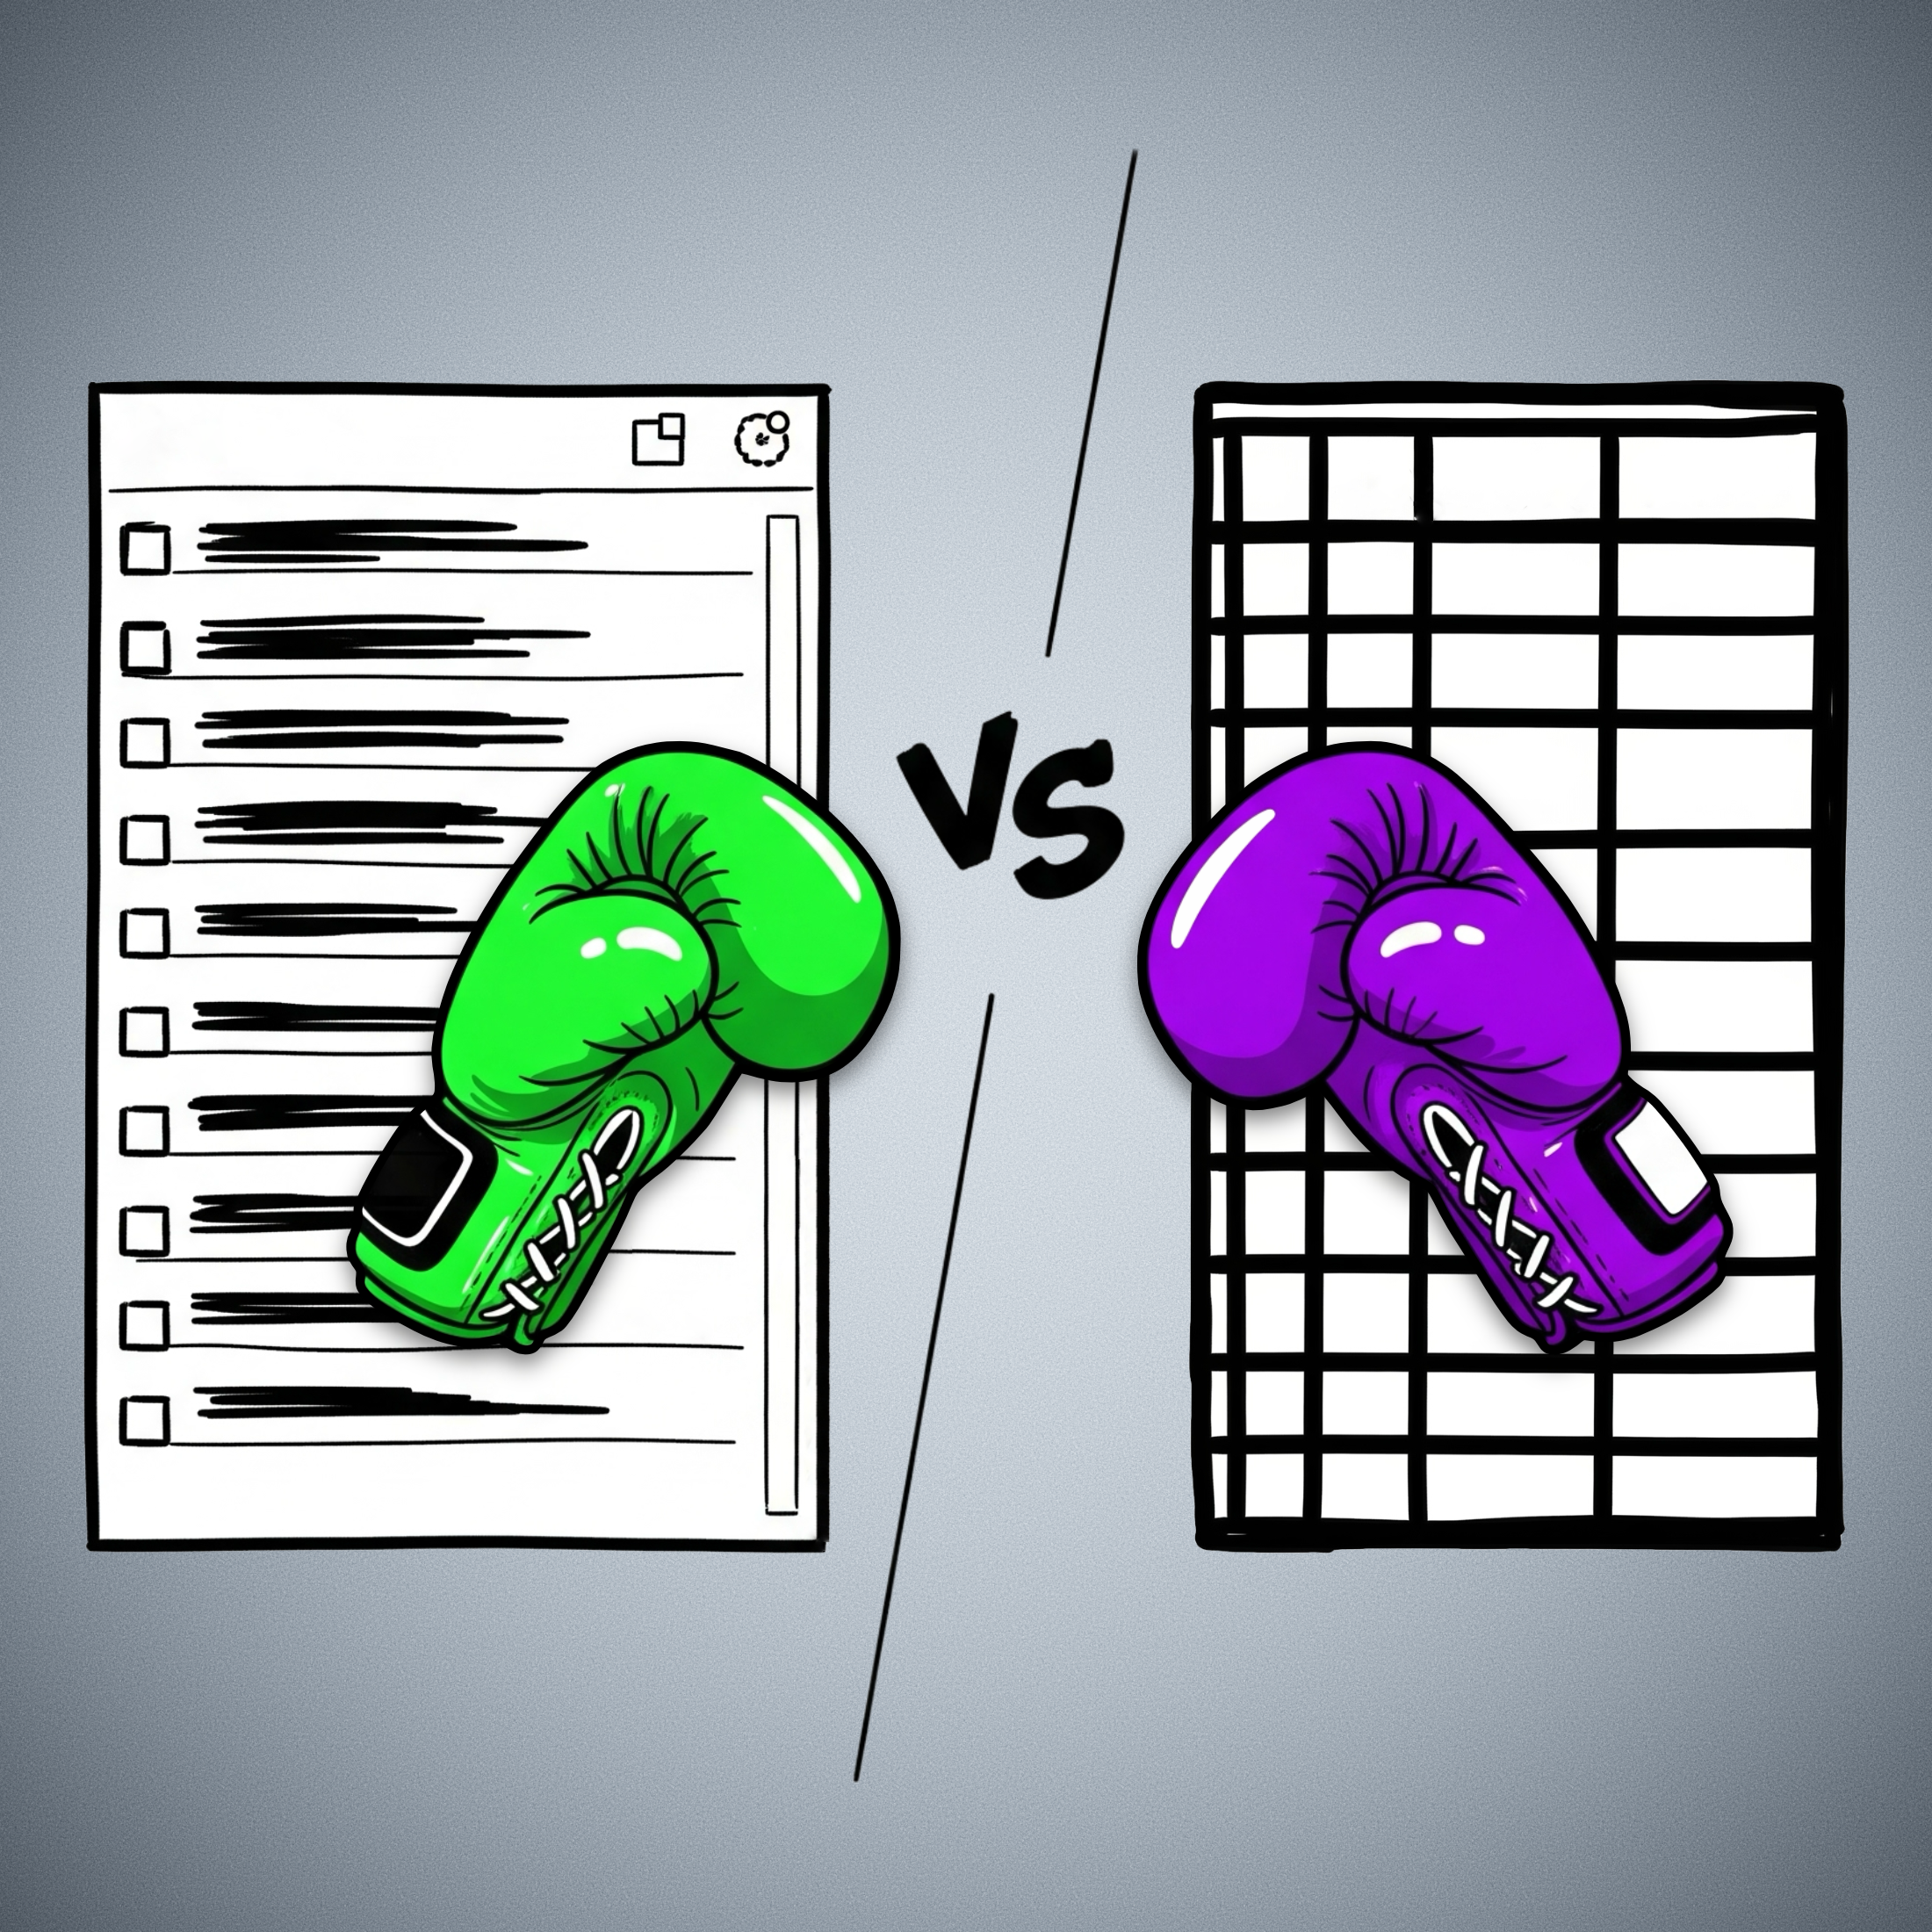
Refining my note-taking workflow—lessons from Evernote for Obsidian.
As someone who believes that serious note-taking needs a solid system, I’ve frequently encountered a challenge: effectively managing my ever-growing collection of notes.
Dynamically switching between multiple views of the same information is a strategy I used a lot in the past. However, I lost that when I moved to Obsidian, as I find its handling of lists of notes less intuitive than Evernote’s elegant approach.
I can’t think of any note-taking app that handles note lists quite like Evernote. Its “All Notes” list is essentially a dynamic filter displaying all your notes. If you’re an Evernote user, you’ve likely noticed that the list automatically refines as you click on notebooks, tags, and so on, transforming to show exactly what you need. This brilliant method of listing notes is something I truly miss in Obsidian.
When you select a notebook, tag, stack, etc. in Evernote, the items in the list are filtered to show only notes within that group. So much so that you can easily replicate this filtering using the advanced search operators.
For example, typing tag:tag-a in the search box yields the same list as clicking on the tag-a tag. Evernote’s AI-powered search functions similarly; the displayed items adjust based on the elements the AI selects to create the filter.
In Obsidian, however, filtering notes by a tag or using the search box will also list the items, but I’m limited in what I can do with the results. While I can clearly see the list, there’s no way to select all items and, for instance, add a tag to them or move that group of notes to a different folder.
In Evernote, this is not only possible but incredibly easy. You just select and move them to another notebook. While a limit on the number of selectable notes exists now, it wasn’t there before Evernote 10.
This clever way of displaying notes does come with technical challenges, though. For example, I believe the current selection limit was imposed because, in the past, moving long lists often led to significant conflicts.
Because there’s no easy way to filter notes in dynamic lists like in Evernote, I opted for subfolders within my Timeline System in Obsidian. But by doing so, I sacrifice a true timeline of my life’s events, as each type of information is located in a separate subfolder.
I haven’t tested Bases yet, but judging by the official documentation, it appears there’s no limit to the size of lists a Bases file can handle. If true, I’ll finally be able to build a real timeline by creating a single Timeline.base file that lists everything from the subfolders within my Timeline folder. Not only that, but I’ll have access to various dynamic filters within that Timeline.base file.
While I’d prefer not to, if the number of files proves too large for the new Bases feature to handle, I can always split it into yearly files: 2025.bases, 2024.bases, 2023.bases, and so on.
It will not be a perfect replacement for Evernote’s list of notes, as I will not be able to select multiple notes to add tags, move them elsewhere, and any other bulk action. But I’ll at least, have a real timeline and multiple possible filters.
The Bases feature is still in beta, and online discussions suggest the final public version will take some time. Meanwhile, I can ensure my Timeline notes have all their properties populated with the proper data, allowing my Timeline.base to beautifully simulate the visual effect of multiple views of the same list, just as I was accustomed to in Evernote.
Ultimately, my goal with the Timeline System is to create a note-taking system that truly adapts to how we think and behave, allowing us to interact with all the information we deal with in a fluid, intuitive way. Bases seems to be a promising step in that direction regarding using the Timeline System in Obsidian.
What about you? Any plans for the new Bases feature?
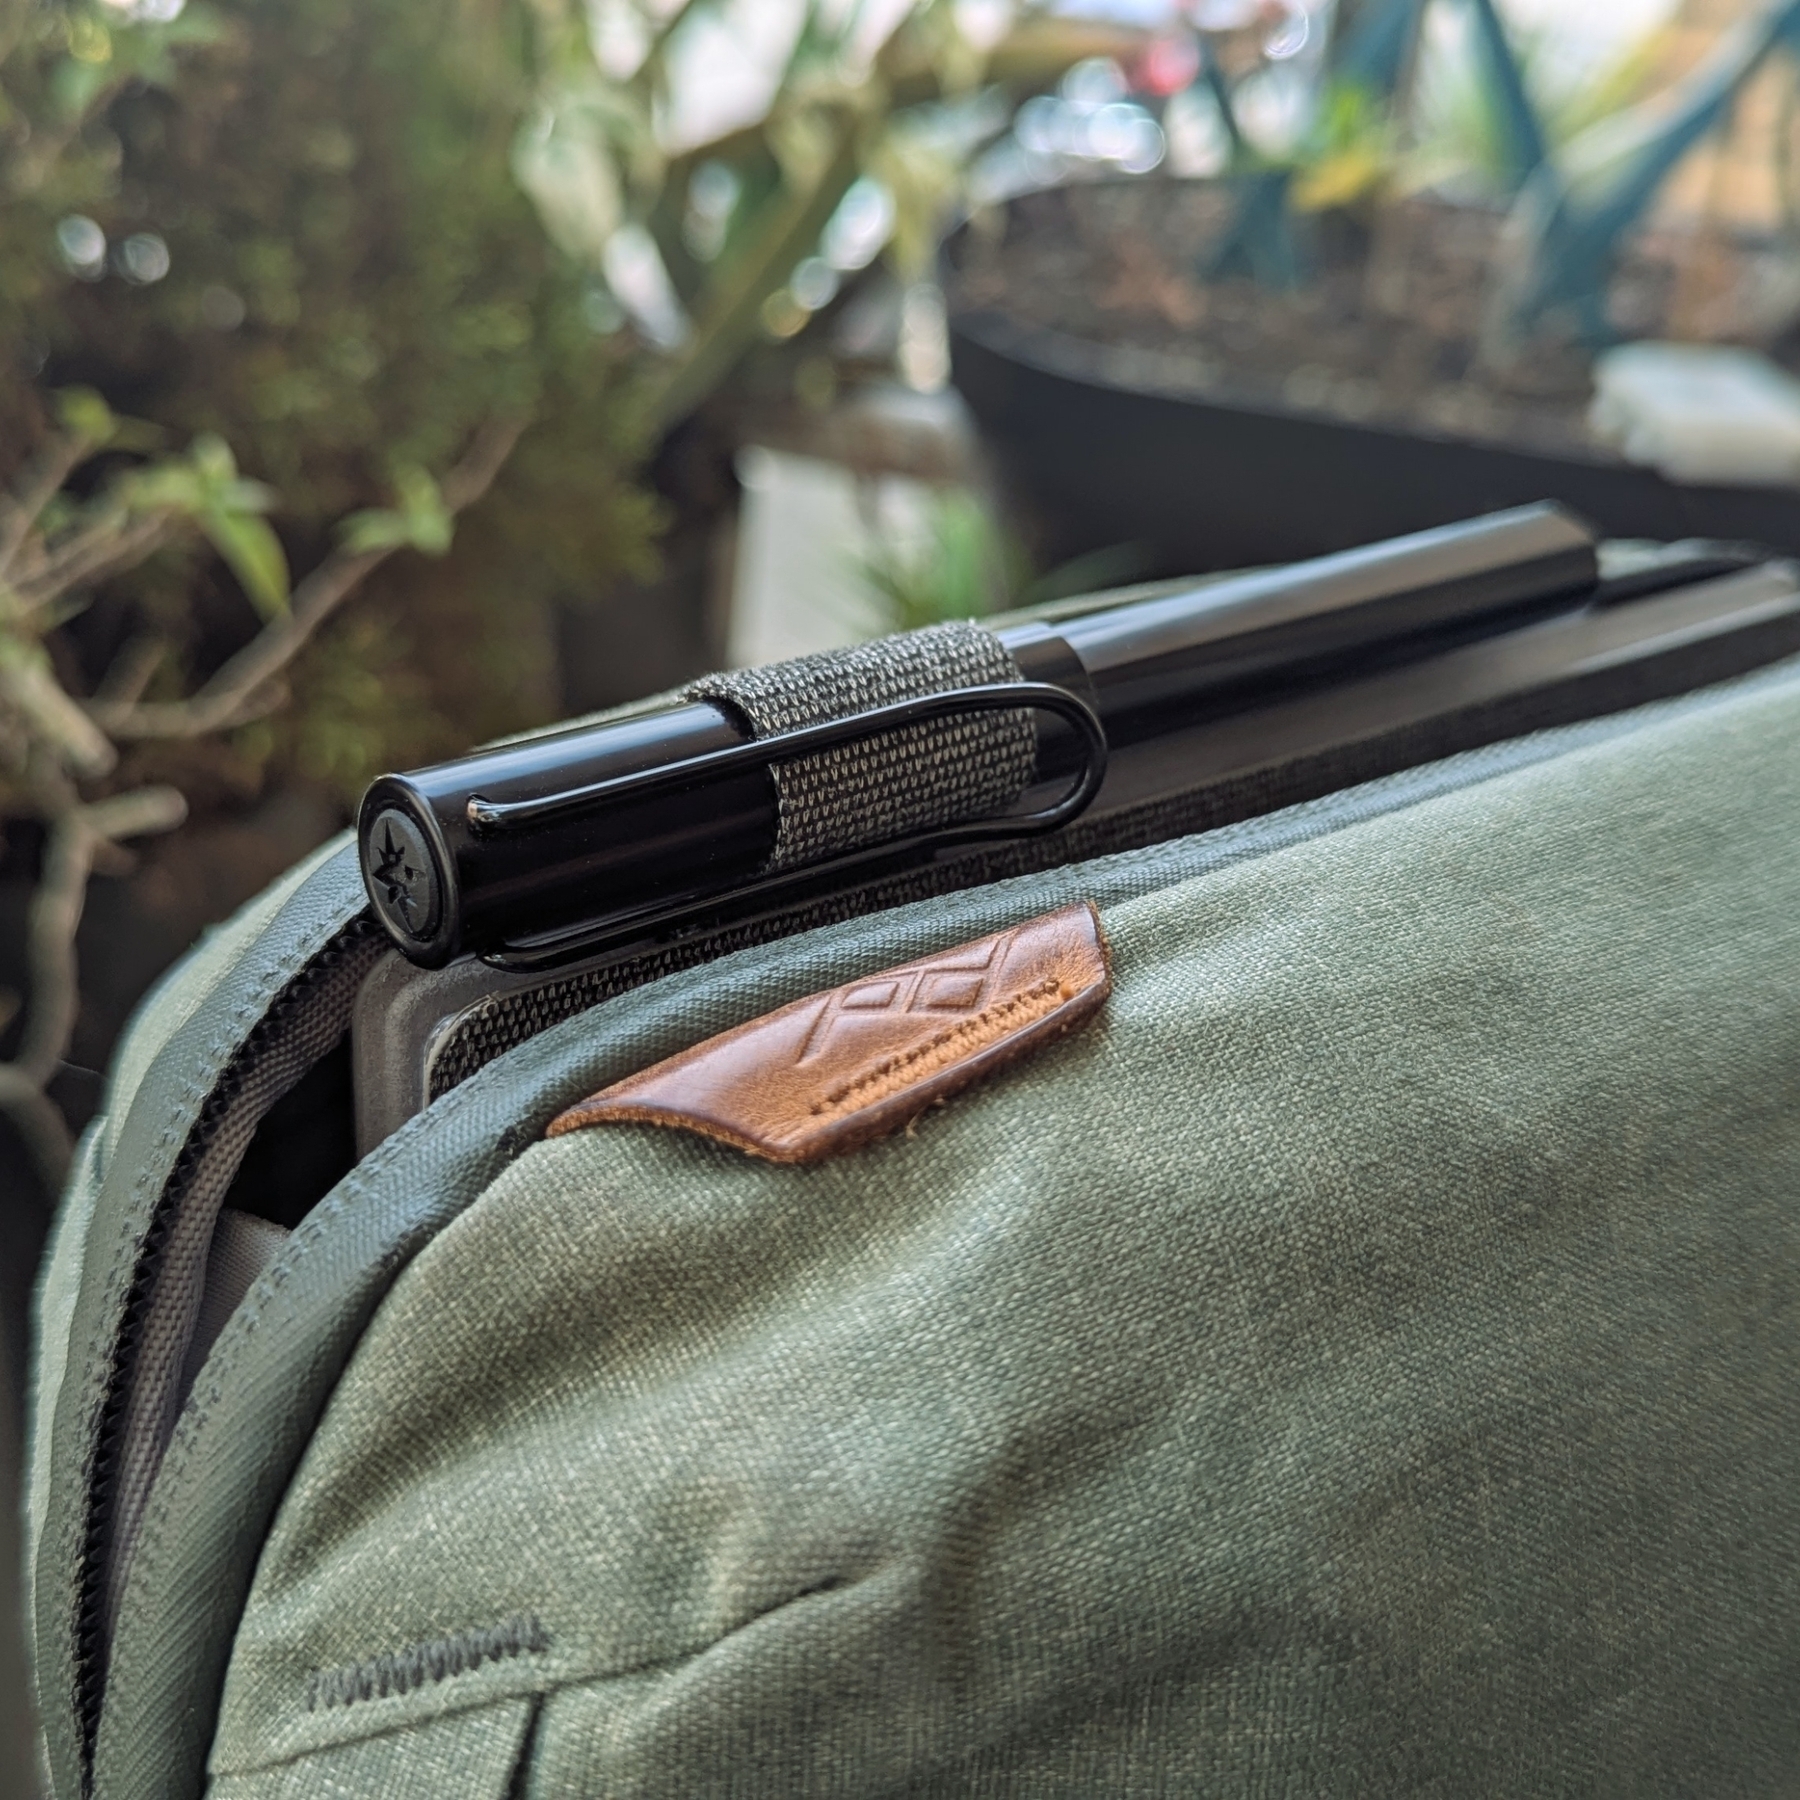
Another reason why I love how hackable the Supernote is. It now precisely fits my EDC setup.
That penholder on the Nomad case is very convenient, but when I wanted to bring the Supernote in my EDC pouch, it was always a pain to make it fit. I had to put some pressure on it to fold the holder down while zipping the bag.
Don’t be mad, but I’ve actually thought of cutting it off a few times. Thankfully, I’m not that young and anxious anymore, so I did what I always do in situations like this. Instead of rushing to cut it, I let the search for a solution slowly brew in my brain.
One day, out of nowhere, I had a ‘click’ moment. A good velcro was probably the solution! I grabbed the device, removed it from the case, and, to my surprise, there were just a few stitches connecting the penholder to the case. “No way it will be that easy,” I thought while looking around for my x-acto knife.
It took me just a few seconds to disconnect them. It was so quick and painless that I completely forgot to take pictures or film it. Sorry.
I’ve said this so many times, but here we go again: I love how hackable the Supernote is! Anyway, I then cut a piece of velcro to precisely fit the rectangular space left behind, used contact glue to attach one side to the case and the other to the pen holder, and voilà.

I considered using thinner velcro, but after some tests, it was evident that it wouldn’t hold the pen in place. The 3M strips I ended up using are probably overkill, but I was super excited about my insight, and I already had those in a drawer.
However, because they are a bit thick, the case is no longer flush with the Supernote. Not a big deal, I thought. It’s just slightly raised on the corner where the penholder is, and the magnets are strong enough to keep everything connected.

I’ve been using this hack for a few months now and couldn’t be happier. The pen stays attached most of the time, and when I want to bring the Supernote with me, there’s no more fighting with the Peak Design Tech Pouch. By the way, let me know if you’d like to see a video of what I carry with me everywhere and how I organize my EDC pouch!
The day I almost ditched Medium. It turns out it was saving my site.
Where is my site? Even a direct search for my name brought back Medium’s logo at the top of the list. Why is Medium now my main digital footprint? Why did my digital home suddenly vanish from Google’s search results?
My first thought was that either the canonical setting was not working or Medium was ignoring it on purpose.
Maybe it was time to ditch Medium for good, I thought.
It was a classic ‘guessing game’ moment, one I found myself falling into more and more recently, despite my background in the cold, hard facts of research and statistics. My father, my wife, and many people around me are researchers. In addition to that, scientific papers, numbers, statistics, etc., were frequent in my graduation and post-graduation courses.
When did I start jumping to conclusions so easily? Perhaps it’s a byproduct of our social media-saturated world, where speculation often overshadows data.
Anyway, before taking the radical step of telling my readers I’d be leaving Medium, I decided to take a deep breath and start doing some research online to try to understand what was happening.
Among other things, my quest made me aware of the Google Search Console, which was a huge rabbit hole I ended up in. But that’s a story for another time. Anyway, when I came across the explanation “Duplicate, Google chose different canonical than user,” I was affected by another guessing moment and quickly blamed Medium. Again!
At this point, my brain was already at full speed trying to figure out a strategy to fix the “Medium problem” when I checked the “Links” menu and saw Medium at the first position of external links bringing traffic to my site. Not only that, but the number was much larger than the second item in the list.
To give you some context, when you start using Google Search Console, the information is not all there at once. It gets built over the coming days after adding a site to be monitored. That lack of all the data probably also contributed to my guessing state. By the way, the “canonical issue” was about other links that had nothing to do with Medium.
Anyway, that’s good news; it was not Medium. Thank you, numbers! But I was now back to square one.
Obsidian Publish
After a lot of reading and long conversations with Gemini to understand all the tech terms I was coming across, it clicked when it mentioned something about the “Disallow search engine indexing” switch on Obsidian Publish settings. “Oh, s***,” I thought, while that unmistakable feeling of “I did something very wrong” permeated my entire body.
When switching to Obsidian Publish, it took me a while to import all my content from the old website, and I didn’t want Google indexing that big mess. That’s why I turned off the search engine indexing. What I completely forgot was to turn it back on, meaning that I completely erased my site from existence for many months. Unbelievable!
The Bright Side
Since I cannot go back in time, I try to always learn something from my mistakes and also look for the bright side of things. And learn I did. A lot! Not just the ins and outs of SEO, but also how important it is for me to regularly check my own online presence, especially since [[vladcampos.com/Action/💡 Consulting|I run my own business]]. From now on, I must create a task or a calendar entry for the future in cases like this.
Knowing that I would lose Medium’s social element by not publishing there anymore, I had to bring back [[vladcampos.com/Static/Newsletter|my newsletter]], which was a detour that brought me into another deep rabbit hole. I told you I learned a lot.
Remember the better RSS feed I created for my website? Well, I can now set it as the source of my newsletter, which I rebranded as “Friday Fix by vladcampos”. As the name implies, subscribers will get a list with links pointing to everything I shared during the week: articles, short posts, podcast episodes, and videos.
In hindsight, I’d say that the terrible mistake of blocking search engines from indexing my site ended up working as a trigger to making my online presence a bit better.
As for Medium, how many times have you seen articles stating that it is terrible for your site? I’ve seen many of those. But in my case, that couldn’t be further from the truth. Maybe because I always set a canonical link to the original article on my site. Anyway, the Google Search Console is a good place to start if you really want to know if it’s helping your site. In the end, using facts—numbers—is a great way to avoid guesswork.
Overall, have fun!
After hacking my own RSS feed for my Obsidian Publish site, it is now time to try some ideas. The first one is automating my blog posts via Mastofeed. I just created a rule that will compose a Mastodon post using the Title, Summary, Link, and Image from my RSS feed.
This first post/test has two goals. Make sure the automation is working and understand what will happen if one of the items, in this case an image, is not present in the original feed.
If you are fed up with Obsidian Publish's limited RSS, here's how I hacked a better feed.
If you’re an Obsidian Publish user, you’ve probably stumbled upon its default RSS feed by adding /rss.xml to your domain. And if you’re like me, you quickly realized how incredibly limited it is – so limited, in fact, that it’s practically unusable for serious blogging.
I completely get the problem here. As Obsidian Publish doesn’t offer a standard blog feature, there isn’t an actual blog feed. However, that hasn’t stopped us users from hacking our way to a solution. So, I decided to also hack a better RSS feed.
The Problem
As I write this, the official RSS feed is not time-based and doesn’t even have a description for each item, even though there is a “description” property that Obsidian-Publish can read. Anyway, I understand the hurdle of going beyond the simplicity of the meta-information available on our notes, especially if one doesn’t use properties.
What I never got, though, is why it doesn’t display the items chronologically, matching the date a note was posted as a web page. I can’t share something like this with people willing to follow my blog posts.
However, even if I avoid sharing it, many modern feed readers look for and find the feed for the user. So, the two problems I have to solve are:
- Having a better RSS feed.
- Making the current
/rss.xmladdress point to that better feed.
I’m not a specialist in any of the fields below. I’m sharing the steps I went through as a way to inspire you. Please do your own research and remember to always make backups of your work before trying the directions below.
How an RSS Feed is Created
I’m not a developer, but along the way I was, let’s say, forced to learn some things. When I started podcasting back in 2005—yes, yes, you read that right—I had to learn how to write a feed. Back then there was no such thing as a tool or AI.
The way I see it, a feed is split into two parts. The top part is like the ‘header’ of your blog, containing essential details like its title, overall description, and your website’s address.
Take a look at mine below, and you’ll notice that it’s easy to guess what is what.
<rss xmlns:atom="http://www.w3.org/2005/Atom" xmlns:media="http://search.yahoo.com/mrss/" version="2.0">
<channel>
<title>vladcampos Blog</title>
<link>https://vladcampos.com</link>
<description>Thoughts and articles from one enthusiast to another.</description>
<language>en-us</language>
<lastBuildDate>Tue, 17 Jun 2025 10:12:00 GMT</lastBuildDate>
<atom:link href="https://social.vladcampos.com/rss.xml" rel="self" type="application/rss+xml"/>
<image>
<url>https://social.vladcampos.com/favicon-196x196.png</url>
<title>vladcampos Blog</title>
<link>https://vladcampos.com/blog</link>
</image>
Below this header are the individual entries, or ‘items,’ for each of your blog posts. Think of each item as a mini-summary of a single post, including its title, a brief description, a link to the full post, and the publication date.
<item>
<title>📃 Things you should know about Obsidian Publish —my struggles and how I'm dealing with them.</title>
<link>https://vladcampos.com/2025-06-16-things-you-should-know-about-obsidian-publish</link>
<guid isPermaLink="true">https://vladcampos.com/2025-06-16-things-you-should-know-about-obsidian-publish</guid>
<description>Obsidian Publish has been a game-changer for my online presence, but like any powerful tool, it comes with its quirks. Here are the hurdles I’ve faced and how I’m jumping them.</description>
<pubDate>Tue, 16 Jun 2025 11:32:00 GMT</pubDate>
</item>
<item>
<title>📃 Turning Bluesky into Instagram - my unexpected workflow.</title>
<link>https://vladcampos.com/2025-06-14-turning-bluesky-into-instagram-my-unexpected-workflow</link>
<guid isPermaLink="true">https://vladcampos.com/2025-06-14-turning-bluesky-into-instagram-my-unexpected-workflow</guid>
<description>Apps like Pinksky transform your Bluesky feed into a visual, Instagram-style experience, but there's a catch.</description>
<pubDate>Sun, 15 Jun 2025 10:31:00 GMT</pubDate>
<media:content url="https://publish-01.obsidian.md/access/54a5cde44e33737dbd9582dc8b12cf1f/vladcampos.com/_files/2025-06-14-pinksky-post-cover-art.png" medium="image" type="image/png"/>
</item>
</channel>
</rss>
Basically, every time there’s a new post in the blog, a new item representing it needs to added ti the feed. And that’s it; whatever software is reading that feed will see that new item.
Building my RSS Feed
This is where the magic happens and where my struggles with manual updates finally ended! I partnered with Gemini to create a simple web app I’m calling the RSS Item Generator.
For that I created another website and assign a subdomain to it using a GitHub repository. It’s a free and easy way to host static websites and you can learn all about it here and here. All I had to do after that was use that space to manually write and publish my own feed. I post frequently, but not that much per week. “It will be fine,” the naive me thought.
It is, indeed, kind of fine, since all I had to do was copy the last content inside <item></item>, paste it at the top of the previous one, and replace the old information with the new one. However, after a few manual updates, I quickly realized how prone to errors this approach was. I searched for a basic app that could generate new items but couldn’t find one.
Like I said, I’m not a developer, but since forever I’ve been having these ideas that I could never put into practice. Until now!
That’s when I turned to Gemini. I explained my needs in detail and asked for help creating a web app to automate the process. The first version was not exactly there but super close to what I envisioned. So, I kept chatting with it, and we came up with what I’m calling an RSS Item Generator.
How it Works
First, you need an RSS file, which is a fancy name for a text file with a .xml extension. Usually rss.xml. Copy the initial section of the RSS code (the ‘header’ part) to a new text document and replace my blog/site information with your own.
Below that, you need to start building the items list. Go to my RSS Item Generator, fill in the blanks with the information from your latest blog post, and click on Generate RSS Item. Now copy that and paste it to the rss.xml file. The most recent <item></item> should be at the top of the list. Make sure it looks like the example below.
<rss xmlns:atom="http://www.w3.org/2005/Atom" xmlns:media="http://search.yahoo.com/mrss/" version="2.0">
<channel>
<title>vladcampos Blog</title>
<link>https://vladcampos.com</link>
<description>Thoughts and articles from one enthusiast to another.</description>
<language>en-us</language>
<lastBuildDate>Tue, 17 Jun 2025 10:12:00 GMT</lastBuildDate>
<atom:link href="https://social.vladcampos.com/rss.xml" rel="self" type="application/rss+xml"/>
<image>
<url>https://social.vladcampos.com/favicon-196x196.png</url>
<title>vladcampos Blog</title>
<link>https://vladcampos.com/blog</link>
</image>
<item>
<title>📃 Things you should know about Obsidian Publish —my struggles and how I'm dealing with them.</title>
<link>https://vladcampos.com/2025-06-16-things-you-should-know-about-obsidian-publish</link>
<guid isPermaLink="true">https://vladcampos.com/2025-06-16-things-you-should-know-about-obsidian-publish</guid>
<description>Obsidian Publish has been a game-changer for my online presence, but like any powerful tool, it comes with its quirks. Here are the hurdles I’ve faced and how I’m jumping them.</description>
<pubDate>Mon, 16 Jun 2025 11:32:00 GMT</pubDate>
</item>
<item>
<title>📃 Turning Bluesky into Instagram - my unexpected workflow.</title>
<link>https://vladcampos.com/2025-06-14-turning-bluesky-into-instagram-my-unexpected-workflow</link>
<guid isPermaLink="true">https://vladcampos.com/2025-06-14-turning-bluesky-into-instagram-my-unexpected-workflow</guid>
<description>Apps like Pinksky transform your Bluesky feed into a visual, Instagram-style experience, but there's a catch.</description>
<pubDate>Sun, 15 Jun 2025 10:31:00 GMT</pubDate>
<media:content url="https://publish-01.obsidian.md/access/54a5cde44e33737dbd9582dc8b12cf1f/vladcampos.com/_files/2025-06-14-pinksky-post-cover-art.png" medium="image" type="image/png"/>
</item>
</channel>
</rss>
But there’s a final touch. Each post item has the publication data inside <pubDate></pubDate>. If you take a look at the top of the feed, there’s also a date inside the <lastBuildDate></lastBuildDate>. That date and time has to be the same as or after the last post you added to the list. So, remember to always copy the date section of the last post published and paste it to the top of the feed.
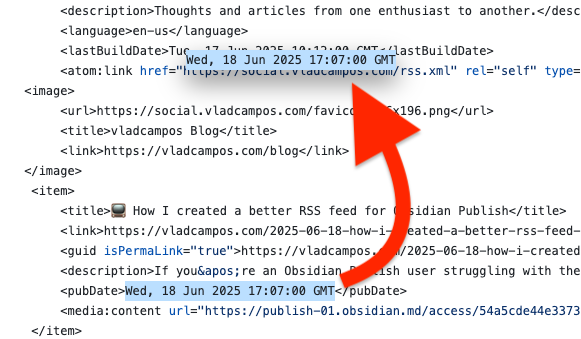
That’s it. All you have to do from now on is keep adding the new <item></item> code blocks and updating the date at <lastBuildDate></lastBuildDate>.
Publishing the RSS Feed
But an RSS feed is only useful if the entire web can see it. So, you need to publish it.
Remember the GitHub repository I mentioned above? That’s where you’ll do it, and to make both of our lives easier, I suggest watching the video below where I go through each step.
Redirecting the /rss.xml
The last item in our list is to redirect the /rss.xml address to the new feed address. You have to do this because there’s no way to unpublish that rss page created by Obsidian Publish. At least I never figured out how.
The redirect will make sure everyone gets the correct feed, including feed aggregators trying to guess it. In my case, it is a redirect from vladcampos.com/rss.xml to social.vladcampos.com/rss.xml . If your website is powered by Obsidian Publish, you are probably using CloudFlare for your domain.
As for the address, share whatever is best for you. I’ll keep sharing vladcampos.com/rss.xml because it is easier to remember. As for aggregators trying to figure out your site’s feed, as long as you have the redirect running, they will always land at the one you’ve created.
One thing to keep in mind is that you’ll need to manually update your rss.xml file with each new post using the generator. While not fully automated, it’s a small price to pay for a fully functional blog feed.
Things you should know about Obsidian Publish — my struggles and how I'm dealing with them.
Obsidian Publish has been a game-changer for my online presence, but like any powerful tool, it comes with its quirks. Here are the hurdles I’ve faced and how I’m overcoming them.
A few days ago, I converted my blog to the Timeline System. If you are interested in more details, there’s a walk-around video that you can watch.
Photos Page
The “Photos page” was inspired by how Micro.blog handles our pictures. When there’s a JPG image in a post, that image will be displayed in a Photos page with a link back to the post.
My solution is more manual, like many other things on the website, but that’s okay. As all this AI buzz grows, I’m trying to find comfort in actually doing things with my type of AI in mind: Attention & Intention.
But don’t get me wrong, I use AI, the other type, all the time. For example, I had this long conversation with Gemini to help me come up with the CSS responsible for the /photos page layout.
Obsidian Publish Limitations
I am delighted with the progress I have made thus far. However, I have also encountered a few bugs and issues during the process.
Since I came back to Obsidian-Publish, I’ve been working hard on creating this mix of a blog and learning center. It has to be something useful for you, but, at the same time, I need a system that will make my life easy. Otherwise, I’ll just stop sharing.
You know that thumbnail when people share posts on social media? There’s a way to set an image to do that on Obsidian Publish. Although it’s a fairly straightforward setting, I never found it to be successful. And because of all the other work going on in the process of building my website, I never took the time to report this and investigate the matter.
Yesterday, I finally reported it on Obsidian’s official forum, which ended up leading me to mxstbr’s post about it.
The problem is some sort of incompatibility with the Permalink setting. I tested it on my website, and he is right. So, let’s hope the Obsidian team comes up with a fix to this.
The other issue is a site behavior that, in my opinion, doesn’t make any sense. As you already know, formatting notes in Obsidian is done with Markdown. But it’s also possible to use regular HTML.
What I found out is that any link that points to an external site will open that site in a new tab. First, I thought that I could solve that using a HTML link, but it keeps opening on another tab even if I use target="_self", which is a way to force the link to open on the same page.
After almost going crazy, I decided to inspect my website code, and, to my amazement, Obsidian Publish replaced the target="_self" with target="_blank", which is how we tell the browser to open the site on a new page.
Why? That doesn’t make any sense. We, the site owners, should be the ones deciding where the page should open.
Anyway, there’s also a complaint about this on the forum. So, let’s hope they fix it. For now, be aware that that’s the reason you’ll be sent to another tab when you click on one of my pictures on the Photos page.
No rel=“me”
This is another HTML attribute that is used by Mastodon and other services to make sure the owner of the website is the same person claiming to be that owner on another site.
It’s such a simple and easy setting, but because of the way Obsidian Publish code works, the rel="me" is not visible, and services cannot use it to verify ownership.
I’ve been complaining about this for a long time, but after being ignored for so long, I decided to come up with a workaround. Because I also needed a Linktree-style page, I created social.vladcampos.com on GitHub and that’s where I included the rel="me code.
Not everyone has time or knowledge to do this, not to mention that it’s not ideal. An official way to solve this would be to provide us with access to the <head> of the site via a file, just like we can do with the publish.css and publish.js files.
That, by the way, would address another issue. The Author Attribution verification. For that, regrettably, I could never come up with a workaround.
The Terrible RSS Feed
Finally, there’s the terrible RSS feed. I can relate to the challenges here, but there is already a feed, which, unfortunately, doesn’t make any sense. For starters, I don’t understand what the criteria used to order the notes are. If they could at least make it ordered by last created note, it would already be at least usable.
The workaround I came up with was to |manually create my feed. Unbelievable, right? It’s 2025! Anyway, I’ll do it again on my GitHub page and share the link on my Obsidian site and on the Linktree-style page.
But, please, don’t get me wrong; I’m thrilled with what Obsidian Publish is enabling me to do. It’s something I have tried and failed on so many other platforms, and it’s now a fascinating work in progress.
Turning Bluesky into Instagram - my unexpected workflow.
Apps like Pinksky transform your Bluesky feed into a visual, Instagram-style experience, but there’s a catch.
When creating a Pinksky account, you have the option to either subscribe using your current Bluesky account or create a new profile. There are advantages and disadvantages to both options. In my case, I have decided to use my current account.
If that’s what you choose to do, remember to create a specific App Password to protect your Bluesky account.
I went with that route because of my experience with another decentralized protocol, the ActivityPub. In addition to my Mastodon account, I ended up creating profiles for Flipboard, Pixelfed, PeerTube, and many others. Long story short, it was a big mess, and, after a while, I had to invest some time reorganizing everything.
That said, the problem with using my current Bluesky account is that the Pinksky feed will include every single image people post. However, an image is not always equivalent to a picture. For example, news profiles usually include a cover image with the link to the article they are posting.
There’s a filter in the top-left corner of the screen (a) where you can choose the option to see only photos, but that will not do it. At least it didn’t change anything on my feed, probably because of what I explained in the paragraph above.

Ideally, I would appreciate it if Pinksky had a setting to allow us to hide some profiles from our feed there, and I did send a suggestion to the developer. But you know me, I had to come up with an Unexpected Workflow, right? So this is what I did.
On Bluesky, I created a new List, which I titled Pinksky Feed, and added some of the people I follow. Specifically, the ones who frequently post pictures I like. Since Pinksky will only show me their posts with pictures, the next step was to set that list as my feed on Pinksky.
If you need help creating a List, check the video below. If you already know how to do it, keep reading to learn how to select it as your default feed on Pinksky.
On Pinksky, tap on the hashtag icon at the top right-corner of the screen (b). Now, at the bottom of the screen, you can see all the ones you created on Bluesky. In my case, one of the options is the Pinksky Feed, which is the one I’ve chosen. The hashtag icon at the top right-corner of the screen (b) now has a small blue dot on it, as a reminder that you are seeing pictures from a specific feed.
And that’s it! From now on, as I go about my Bluesky browsing, I’ll simply add any cool, photo-focused accounts I find to that list.
How to create a specific Bluesky password for each App
By creating a specific password for each app, you not only avoid sharing your Bluesky password, but you can also easily revoke access if you need to.
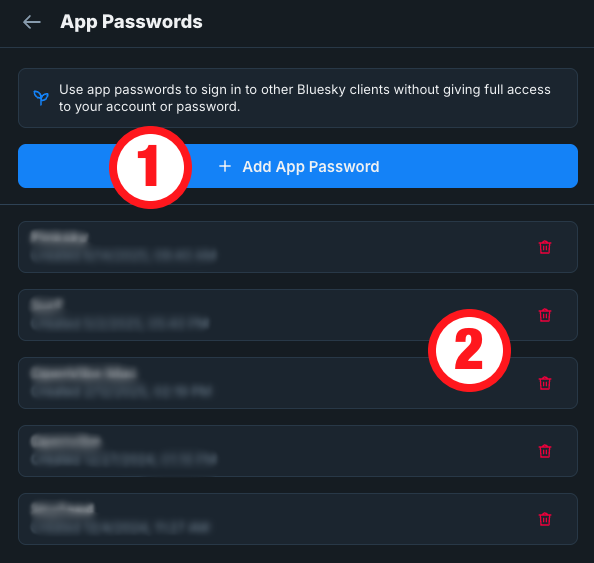
Go to Settings and then click on Privacy & Security. The option we are looking for is App Passwords. Click on it, and if it’s your first time there, you’ll only see the Add App Password button (1). However, as shown in the image below, in my case, there are already some passwords that can be revoked by clicking the trashcan icon (2).
To create a password, click on the Add App Password button and type a name in the box. I always type the name of the app where I’m using that password. It will help me remember where you used that password, in case I want to revoke it in the future.
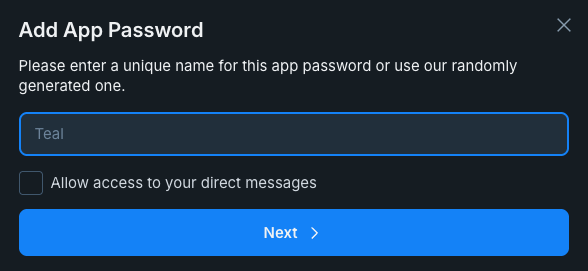
There’s also a box to Allow access to your direct message . This is precisely what it says, and that’s why I prefer to never check that box. But, of course, it’s up to you.
Caliban's War
When was the last time I read a fiction book as quickly as Leviathan Wakes I don’t even remember. Even before finishing it I bought Caliban’s War, which I’m also enjoying very much. But this time I’m reading it on my Supernote.

I started reading it using the Supernote’s ePub reader, but after learning about the amazing BookFusion plugin for Obsidian, I had to install the BookFusion app on my Supernote, and that’s where I’m currently reading it. By the way, a video about all these tech adventures is coming soon.
ep.4 - How I save Obsidian notes for the future
There are situations where we need to save information for the future and have no exact idea when we’ll need it. In today’s episode, I’m sharing a strategy I used this past weekend.
3 o’clock podcast
Practical tips and real-life examples of the Timeline System. Learn how to use Action, Static, and Timeline containers to improve your workflow. Subscribe on iTunes, PocketCasts, Spotify, YouTube, or RSS.
ep.3 - My preferred method of notification is proactivity
When it comes to tasks in Obsidian or elsewhere, I prefer a more proactive approach rather than relying on notifications. As with everything else in the Timeline System, I’m looking for direction; the specifics of what and when I’ll do it depend on the situation at hand.
Resources and References
- How I’m using the Homepage plugin in Obsidian (2025)
- Mastering my To-Do’s (Obsidian Tasks—Part 1)
- How to delete done tasks automatically (Obsidian Tasks—Part 2)
- What’s new to my Obsidian Tasks system and other updates
3 o’clock podcast
Practical tips and real-life examples of the Timeline System. Learn how to use Action, Static, and Timeline containers to improve your workflow. Subscribe on iTunes, PocketCasts, Spotify, YouTube, or RSS.
What is Syncthing-Fork
After the Syncthing Foundation decided to discontinue the Android client, I’ve been using Syncthing-Fork, which is non-official open-source version based on the original Syncthing for Android.