Obsidian
- First you have to find you Kindle serial number.
- Then you can follow this instructions to instal the DeDRM_tools plugin
Things you should know about Obsidian Publish — my struggles and how I'm dealing with them.
Obsidian Publish has been a game-changer for my online presence, but like any powerful tool, it comes with its quirks. Here are the hurdles I’ve faced and how I’m overcoming them.
A few days ago, I converted my blog to the Timeline System. If you are interested in more details, there’s a walk-around video that you can watch.
Photos Page
The “Photos page” was inspired by how Micro.blog handles our pictures. When there’s a JPG image in a post, that image will be displayed in a Photos page with a link back to the post.
My solution is more manual, like many other things on the website, but that’s okay. As all this AI buzz grows, I’m trying to find comfort in actually doing things with my type of AI in mind: Attention & Intention.
But don’t get me wrong, I use AI, the other type, all the time. For example, I had this long conversation with Gemini to help me come up with the CSS responsible for the /photos page layout.
Obsidian Publish Limitations
I am delighted with the progress I have made thus far. However, I have also encountered a few bugs and issues during the process.
Since I came back to Obsidian-Publish, I’ve been working hard on creating this mix of a blog and learning center. It has to be something useful for you, but, at the same time, I need a system that will make my life easy. Otherwise, I’ll just stop sharing.
You know that thumbnail when people share posts on social media? There’s a way to set an image to do that on Obsidian Publish. Although it’s a fairly straightforward setting, I never found it to be successful. And because of all the other work going on in the process of building my website, I never took the time to report this and investigate the matter.
Yesterday, I finally reported it on Obsidian’s official forum, which ended up leading me to mxstbr’s post about it.
The problem is some sort of incompatibility with the Permalink setting. I tested it on my website, and he is right. So, let’s hope the Obsidian team comes up with a fix to this.
The other issue is a site behavior that, in my opinion, doesn’t make any sense. As you already know, formatting notes in Obsidian is done with Markdown. But it’s also possible to use regular HTML.
What I found out is that any link that points to an external site will open that site in a new tab. First, I thought that I could solve that using a HTML link, but it keeps opening on another tab even if I use target="_self", which is a way to force the link to open on the same page.
After almost going crazy, I decided to inspect my website code, and, to my amazement, Obsidian Publish replaced the target="_self" with target="_blank", which is how we tell the browser to open the site on a new page.
Why? That doesn’t make any sense. We, the site owners, should be the ones deciding where the page should open.
Anyway, there’s also a complaint about this on the forum. So, let’s hope they fix it. For now, be aware that that’s the reason you’ll be sent to another tab when you click on one of my pictures on the Photos page.
No rel=“me”
This is another HTML attribute that is used by Mastodon and other services to make sure the owner of the website is the same person claiming to be that owner on another site.
It’s such a simple and easy setting, but because of the way Obsidian Publish code works, the rel="me" is not visible, and services cannot use it to verify ownership.
I’ve been complaining about this for a long time, but after being ignored for so long, I decided to come up with a workaround. Because I also needed a Linktree-style page, I created social.vladcampos.com on GitHub and that’s where I included the rel="me code.
Not everyone has time or knowledge to do this, not to mention that it’s not ideal. An official way to solve this would be to provide us with access to the <head> of the site via a file, just like we can do with the publish.css and publish.js files.
That, by the way, would address another issue. The Author Attribution verification. For that, regrettably, I could never come up with a workaround.
The Terrible RSS Feed
Finally, there’s the terrible RSS feed. I can relate to the challenges here, but there is already a feed, which, unfortunately, doesn’t make any sense. For starters, I don’t understand what the criteria used to order the notes are. If they could at least make it ordered by last created note, it would already be at least usable.
The workaround I came up with was to |manually create my feed. Unbelievable, right? It’s 2025! Anyway, I’ll do it again on my GitHub page and share the link on my Obsidian site and on the Linktree-style page.
But, please, don’t get me wrong; I’m thrilled with what Obsidian Publish is enabling me to do. It’s something I have tried and failed on so many other platforms, and it’s now a fascinating work in progress.
Como controlar o vencimento de documentos usando o Obsidian.
Como organizo meus documentos pessoais no Obsidian para acesso rápido e, ao mesmo tempo, controlo a validade de cada um deles.
Conteúdo Relacionado
Como guardo no Obsidian um arquivo que usarei só no futuro
Há situações em que precisamos guardar informações para um futuro e não temos ideia exata de quando necessitaremos destas informações. No episódio de hoje, compartilho uma estratégia que utilizei no final de semana.
Lidando com anexos no Obsidian
O Moacir Junior deixou um comentário com uma pergunta sobre como lido com anexos no Obsidian e este é o tema do episódio de hoje.
My super simple Google Calendar hack for Obsidian
Having both Obsidian and Google Calendar constantly open, was driving me a little crazy because of all the back and forth. Now, one click and I’m there. So simple, so helpful.
Yes, I’m aware of the calendar plugins, but, after trying several options, I’m not happy with any of them. So, I came up with a temporary solution that, to be honest, I’m using for a while and, at least for the moment, it made me stop pursuing other alternatives.
Despite its simplicity, it’s been a game-changer for me, and that’s why I decided to share this hack with.
What I did was use the relatively new Web View feature to open Google Calendar inside Obsidian. But there’s more. I also set the Google-Calendar tab as pinned, which makes it always open when I open Obsidian. And because I use Obsidian in dark mode, I also set Google Calendar to dark mode, and it now blends perfectly as if it is an integral part of Obsidian.
If you are having a hard time visualizing all this, you can watch the video below. In my case, I had to also change some setting on another plugin, the ‘Hompage’, which I also explain why and show in the video.
I freed my Kindle library and have it synchronized with all my devices
First, I converted the books to ePub using Calibre. Next, they joined my Timeline System in Obsidian for automatic synchronization across all devices, Supernote included.
Like many other modern conveniences, the Kindle ecosystem is built to keep us locked in. As you know, I’ve been taking down walls around digital goods I won, and now it’s time to do it with my books. This project has been on my list for a long time, but it was a recent feature removal from Amazon that motivated me to finally pull the trigger.
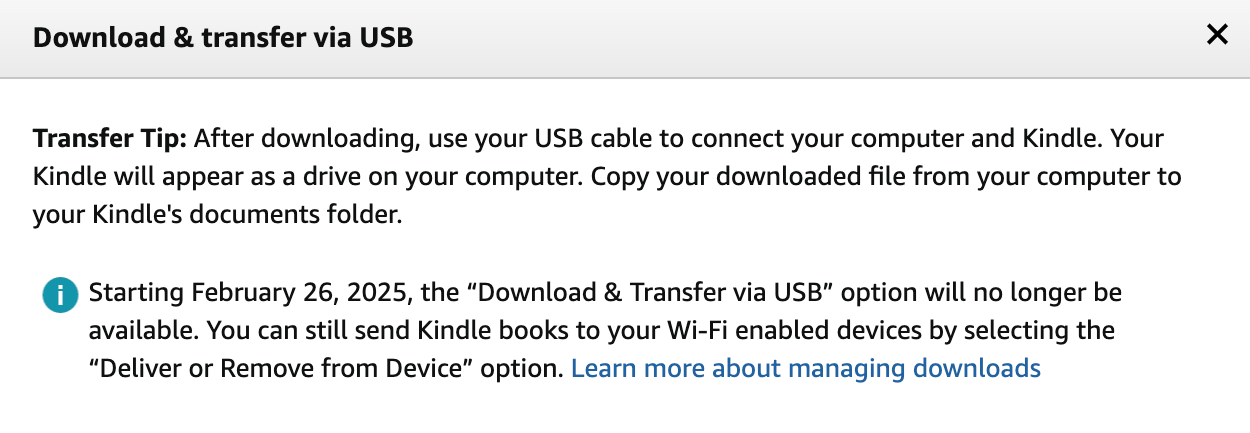
We used to be able to go to Amazon.com and download our Kindle books, but that’s not possible anymore. A while ago, when Amazon announced the policy change, I downloaded all my books. If you haven’t done that, I believe you can still have access to them by connecting your Kindle to a computer and manually coping the books.
But having the books is just part of the process, as the majority of them are linked to your account via what’s called DRM. Additionally, Amazon uses a proprietary format instead of ePub, which is more widely adopted by e-book readers. In other words, it’s like having your books locked in a box that is locked in another box.
Calibre is the master key that can help us with all of these locks. Additionally, it works as a library management software, keeping all the books in a folder on our computer. That’s just perfect for the Digital Caveman project, right?
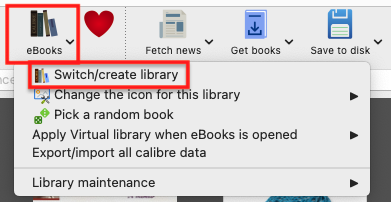
When you are first installing the app, it will suggest a folder for your library, but you can change it to what better suits you. In my case, I created a new Static Container (folder) called ‘eBooks’. And because the files in my Timeline System structure synchronize with multiple devices, my library is now widely available. But I’m getting ahead of myself.
As a tip, you can also move the library to a different folder in the future. Just click on the ‘eBooks’ button on the toolbar to choose a new location.
Next, we need to prepare Calibre to be able to remove the DRM from our books. This is done in two parts. First, we need to install and set up a plugin. It’s only after doing this that we’ll be able to tell Calibre to remove the DRM and convert the books to ePub.
Preparing Calibre
Add the serial number to the box and that’s it.
Converting to ePub
With all the above done, go to Calibre’s main window and click on the ‘Add books’ buttons. Select one or more books, and they will be added to your library’s folder.
Next, select one or more books in the list and click on the ‘Convert books’ option. You’ll see a new window with countless details that you can tweak on each book. There are even several formats available in addition to ePub, which is the pre-selected on. In my case, I kept everything as it was and clicked on the button to convert.
The Supernote
To understand how my books are being automatically sent to my Supernote, I suggest watching the video below.
But remember, the books are in my Obsidian Vault. And looking at how Calibre creates folders for each author, I’m already having insights about making those folders somehow connected to other content I have in Obsidian. Especially the ‘Knowledge Base’ notes, which share a strong relationship with the books I read. And that’s one of the reasons I chose to set the ‘eBooks’ folder as a Static Container.
The Digital Caveman Project
There are plenty of details I still would like to adjust, but all the digital content I create and own is now local first and free from walled gardens. In other words, 100% under my control.
In addition to my notes and website being created in Obsidian, my music, photos, now my books, every single file I use for my personal life and work, and even my passwords, are on my computer first. I even have my own ‘cloud’ system and a backup strategy.
🪨 I did it!
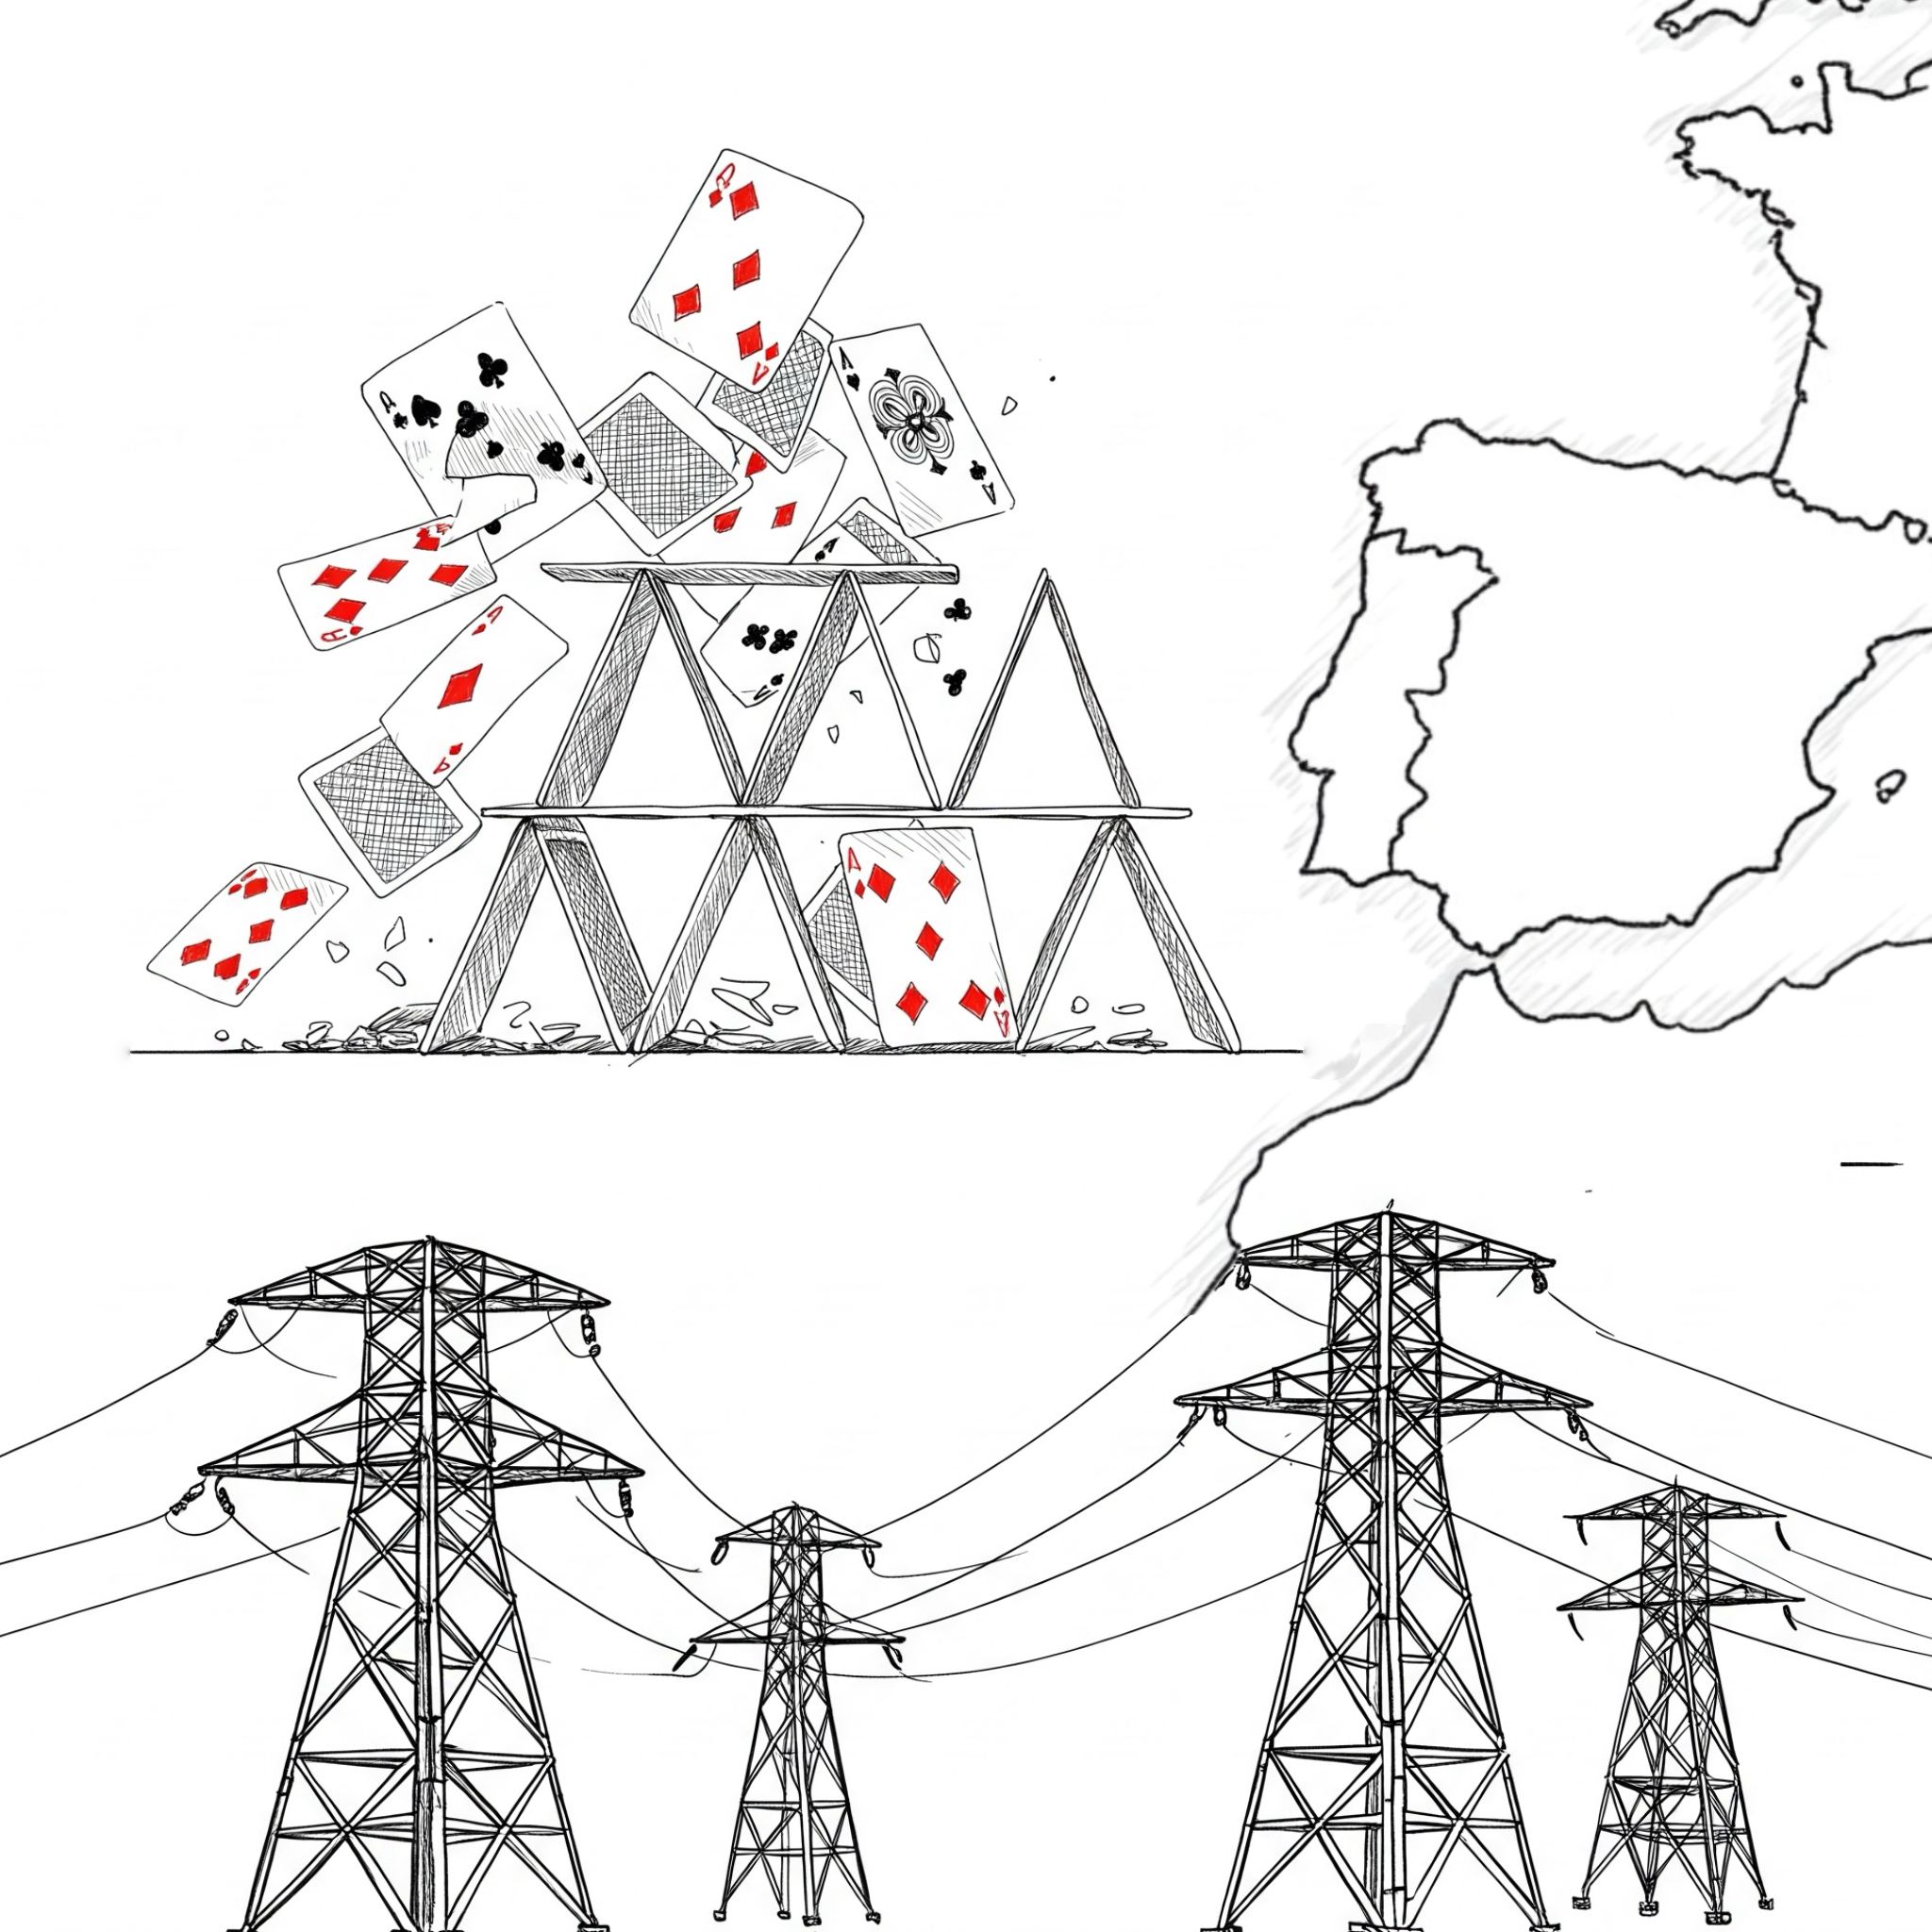
Our modern society is nothing but a delicate house of cards
If you don’t live in Portugal or Spain, it will be impossible for you to understand the feelings I’m trying to convey below. And I sincerely hope you never have to deal with it.
Around 11:30 a.m., the external monitor I have hooked to my laptop went black while I was editing a video. If the room’s light hadn’t also been shut off, I would think it was a simple connection issue. This type of incident is such a rare phenomenon that at first I thought it was related to my apartment or building and decided to go for a walk with my dog.
Heading to the dog park, I grabbed my phone to share the “morning event” with my wife. Yes, we keep in touch all the time using Signal.
This was the moment I sensed something bigger was happening, but I still thought it was a local thing. My phone data connection was down, and as someone who has worked for 10 years in the telecommunications sector, I know that something like that rarely happens. There are so many contingencies and backups. Something else must be going on.
Maybe the entire neighborhood lost power, and, for some reason, the backup generator at the mobile phone tower closest to me didn’t kick off, I thought, trying to rationalize the situation.
I don’t know if it was instinct, but I immediately sent my wife an SMS: “I have no idea what’s happening, but we lost power and I have no data on my phone”. Again, because of many years of experience, I know how SMS works and how it is such a robust feature of the network.
The SMS took longer than expected to be sent, and that was another undesired sign. Perhaps she didn’t get it. My wife is currently on an overseas trip, so I text a friend here in Portugal: “We lost power, and I have no data on my phone. What about you?” “We also lost power, and I can barely use data. It looks like it’s affecting the entire country.”
This is when I started having very unwanted thoughts. Instant communication is a crucial element that we take for granted. But if you think about it, modern society has been building on top of this core infrastructure since the invention of the telegraph.
Let me provide you with further context of the situation I found myself in at that moment. Every single appliance and piece of equipment in my house is electric, so there’s no way to cook or take a hot shower. The TV cable is an Ethernet connector that plugs into an Internet hub, so there’s no way to watch the news. I also just sold my car, so no analog radio as well.
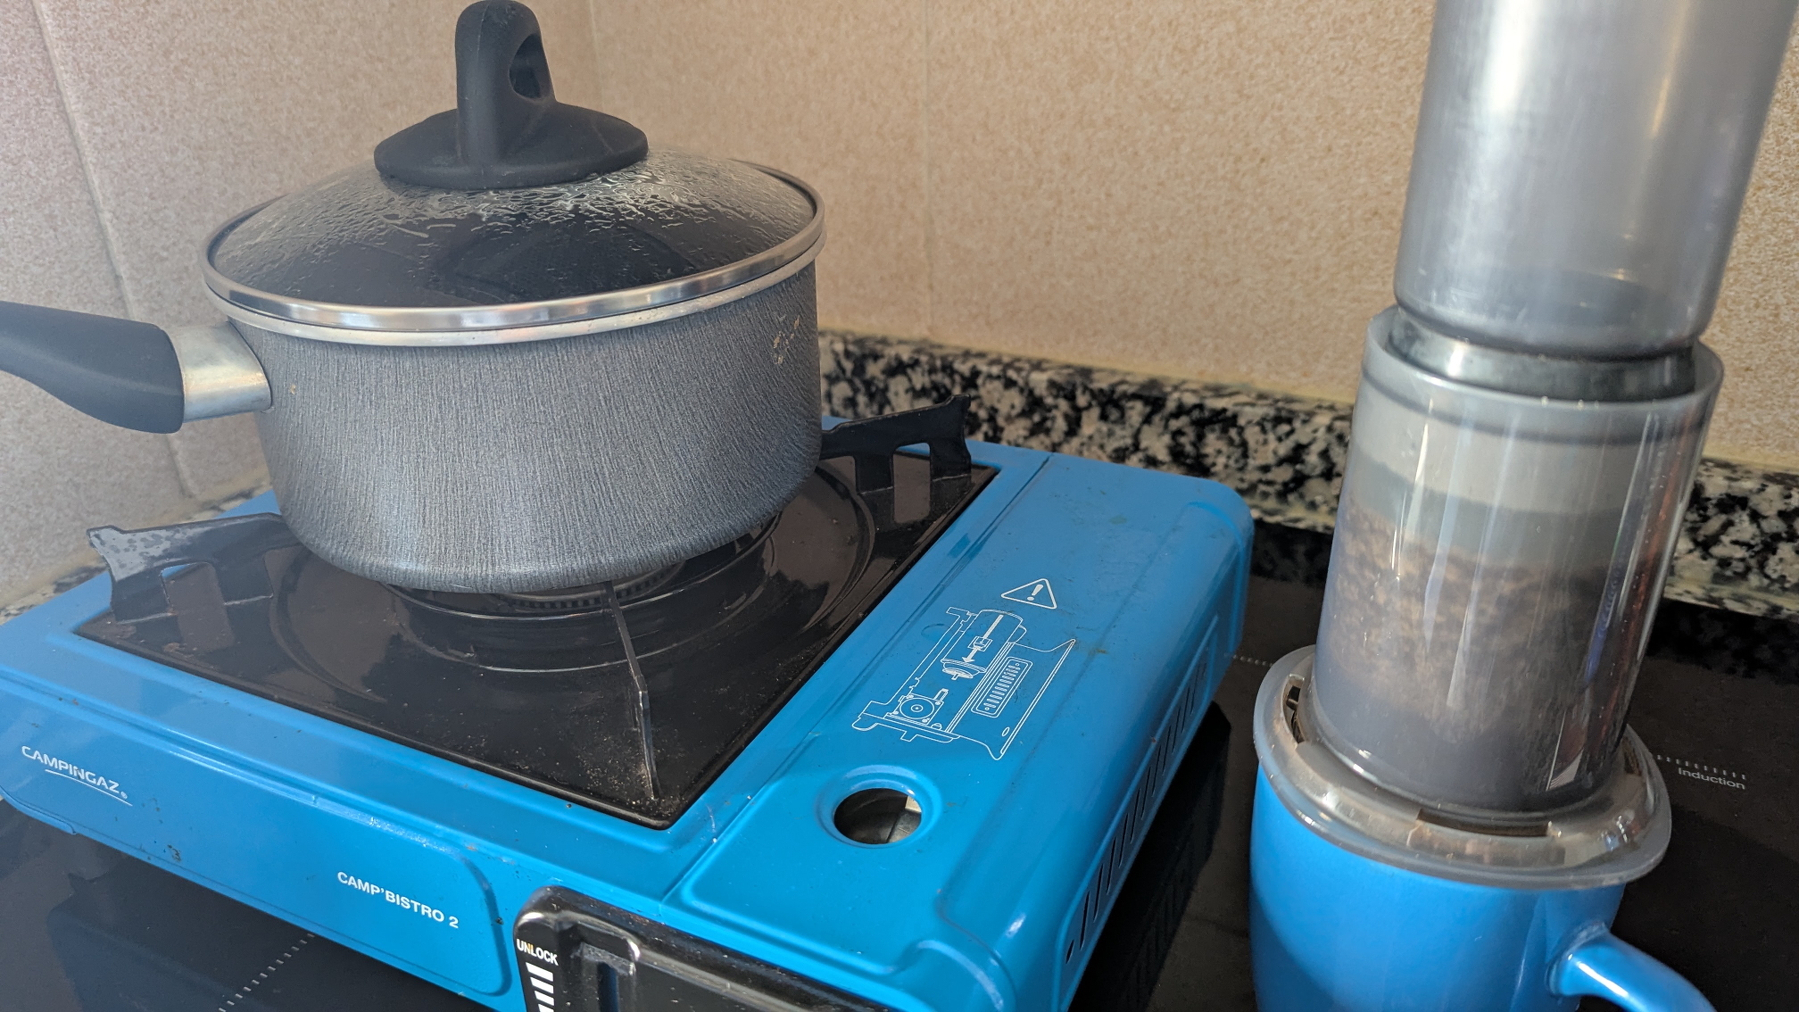
To make coffee that day, I used my gas-powered camping stove, which I ironically set up on top of its modern induction successor.
Okay, this is a national situation. A big one because the phones went down. If there’s a positive side to this, it’s that there are probably dozens of people working tirelessly to fix it. Again, little did I know.
Here’s when I decided I had to stay calm. I ate the rest of yesterday’s salad, grabbed my iPod, a book (the paper type), and thought to myself, If this is not solved until 4 p.m., I’ll go buy some extra supplies.
I read for two hours, but at some less engaging parts, I couldn’t help but stop and think about this unusual and unexpected situation. Looking around, I began to see all these wonderful sparks of beauty in the midst of the chaos. From my balcony, where I was reading, I could see all the other people on their balconies, kids playing on the street, and neighbors having fun conversations on their doorsteps.
I remember it now. This is how the world used to be when I was a kid, and even a teenager. This is how people used to behave before mobile phones existed.
Back to reality. “It’s 4 p.m. Time to buy some supplies,” I reminded myself.
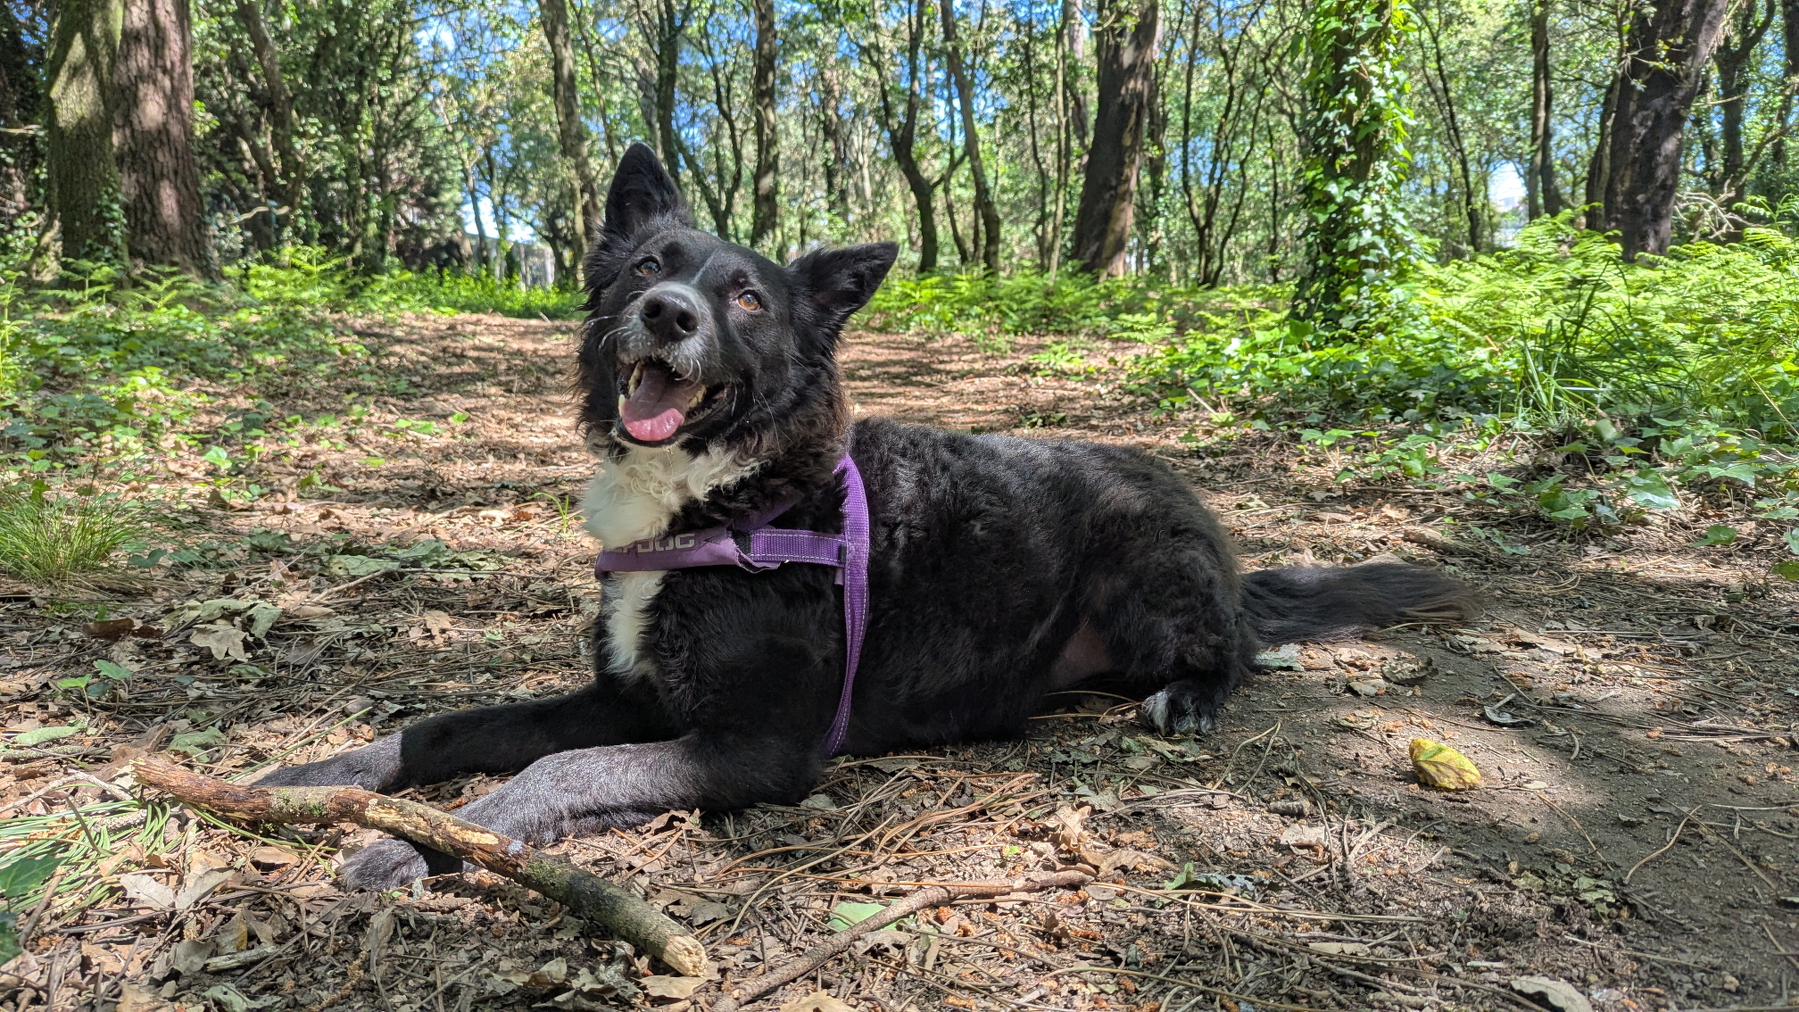
I decided to bring my dog to a nice place we usually go together to relax, before heading to the supermarket. If there was one happy soul in the house, that was my dog. Ignorance is bliss.
Going to another dog park on the same day must be winning the dog’s lottery, right? It’s a somewhat hidden micro forest on the way to the supermarket. We stayed there, going back and forth from having fun to relaxing for a while. Then we headed to our main mission.
With no shopping carts available and so many people inside, the outcome couldn’t be different. The number of shelves empty was impressive. To give you some context, something like this never happened during COVID-19. Thankfully, I don’t need much, but that’s one more unwelcoming sign to add to my list, I thought to myself.
On the other hand, I kept seeing all these kids playing on the streets and so many adults in front of houses having conversations face to face and laughing without looking at their phones. Those scenes were absolutely beautiful.
As all of this was going on, I still didn’t have any mobile data and, shortly after texting my wife and my friend in the morning, the SMS system stopped working. If you haven’t guessed yet, there was no calling as well.
All the information I had, was collected here and there, talking to others on the street. But because most people didn’t have access to the rest of the world, it was impossible to know what was really happening. Moreover, all the ones I talked to would start the sentence with something like “I heard that…”
Experience, or perhaps hope, was telling me to keep sending journaling messages to my wife, and so I did. At this point, I was already back to using Signal, where I started narrating everything I was doing. That was the only app I kept opened all the time, hooping for momentarily breaths of the network.
If, for some reason, the network comes up for a few seconds or minutes, she’ll get all the updates. I didn’t know it at that moment, but she was doing the same on her side, and at about 7 p.m., a relieving exchange happened. I saw a burst of messages from her, and the read update pop-up on all the messages I had previously sent here. That would never happen again until the power and network came back to life at about 11 p.m. But at least she was now aware of what was happening to me.
I don’t know if this applies to everyone, but as I grew older, I started understanding that many things in life were never supposed to be about me. At some point, I learned that it’s about what I mean to other people, and that’s why I have to take care of myself. That’s for them! And it goes both ways, of course. Anything we do is always affecting the ones who love us, and this perception became so important to me that I’m constantly more worried about the feelings of the others, the loved ones. It’s like going to a funeral. Our main responsibility there is to comfort the ones that are still alive. We are there for them. Loving is seldom about us, and I wish I had learned this early in life.
Anyway, back to my ordeal. You know me, I’ve been detaching my digital life from the cloud for a long time. And I do have equipment to survive in a situation like this for a few days. Of course, I learned some new lessons with this test the world just tossed at me, and I’ll do my homework.
However, as a society, I think we are digging our own grave. Why are we increasingly relying on the cloud for everything? Why do all things have to have an app that has to be connected to the Internet to work? The more I think about it, the more I see unreliable digital conveniences replacing the so-called “outdated” gadgets that are still working so well. This is nothing more than building a gigantic house of cards. And to further add more salt to the injury, it is probably being built on top of a single point of failure.
This digital modern life of ours is so bizarre. Among all the real and relevant concerns I was having yesterday, it also occurred to me that I would lose my 775 streak on Duolingo if I couldn’t do my lesson today. Seriously?! The simple fact that something as futile as that crossed my mind is so absurd!
Today, I woke up feeling slightly stressed from my adventures, and I still have a bit of a headache. Nothing terrible or distressing happened yesterday. Thankfully, I was working from home, and everything was calm in my neighborhood. But, in retrospect, I think the real burden I felt was the thought of possibly not being able to connect with my loved ones living in different parts of the world. That, and the fact that nobody knew exactly what was happening or how many days would be like that. I didn’t miss anything else related to the Internet, just that connection with others and the real-time information that comes with instant communication.
By the way, I’m old enough to say that most of what we did at the beginning of the web was communicating via email, forums, blog comments, etc. It was a lot of fun!
I’m grateful to have power and communication back, but, when walking with my dog this morning, I saw people quickly resuming their lives just like if nothing had happened, and, in a way, that made me sad. Yesterday’s flourishes of harmony and beauty are now gone, like busted soap bubbles.
The insane society we are building for ourselves is now back on track, and the house of cards is sitting there waiting for the next breeze. Until then, the only sign of the now gone problems was a possible bug that kept the public lighting still on during this morning.
Inside my Obsidian Homepage-a portal to what matters most.
Do you have an Obsidian homepage? What’s on there? 🤔 Mine gives me instant access to tasks, trips, projects, and family info. It works as an efficient dashboard to what matters most.
First things first. My homepage is basically a note, automatically updated with dynamic information from other parts of Obsidian. In other words, it’s a dashboard created using the Homepage plugin, as demonstrated in the video below.
Since it is the first thing I see when I open Obsidian, I expect the information there to be what I’ll be looking for most of the time. And what could be more relevant than my next tasks?
Using the Tasks plugin and some basic configuration that you can learn in the video below, I created four dynamic lists: Overdue, Today, Tomorrow, and Upcoming. There’s also a fifth one that is mostly for groceries, but I also use it for anything I need to buy. That’s why it’s called Purshases.
Next is a world map widget with pins on every place I’ve been. It’s a backup of what I have on Google Maps and is built and automaticity updated using the Map plugin. There’s also a short list with links to the itinerary notes of my next trips. I could have this list dynamically built like the tasks, but I don’t travel that much and manually creating it is easier and, as you soon see, more useful.
The dashboard information is ordered by how often I need or use each module. That explains my tasks at the top, but why the trips section is right below it? Well, there are at least two parts to a trip: planing and the trip itself. In my case, there’s also a third part. I love to keep a journal during the trip, and when I return, I adjust the details here and there.
Planing and organizing a trip is more than a list of tasks. So, having the link to the itinerary note means that I can constantly go there to monitor what I have already done and what I still need to do. Then, during the trip, I can easily open the itinerary, and inside that note, find invaluable information, like a link to the hotel on Google Maps.
Since I see the Homepage every time I open Obsidian, there’s almost zero friction. It’s just a matter of scrolling a little bit to get to the links right below my tasks and click or tap.
When I come back, it’s time for some fine-tuning, and that’s when not having the next trips list automated is helpful. If links to past trips have not yet been removed, it means that I still have some work to do. By the way, this is a strategy I use all the time. Keeping things in an undesirable place is a constant reminder.
And it also works for physical objects too. For example, I recently kept a giant bicycle lock on top of my desk to remind me that I needed to make a copy of its key.
Back to the Homepage.
Next is a Canvas widget of my Knowledge Base. It used to be the only one, but below it, I now have another one with all the information related to my Apple IIe project. That project was dormant for more than a year, and it wouldn’t make sense to keep it on the Homepage. Now that I’m working on it again, having a direct link to all that information is very welcome. This demonstrates how dynamic the Homepage is.
And speaking about the Canvas, it has become my go-to feature for visually organizing all the information I have in my Static Containers. My Family Documents container is probably the next contender to be displayed like that. But for now, they are embedded notes on my Homepage.
It’s a long list that sits as the last segment because it is definitely something I frequently use, but it’s the least needed when compared to the other items.
Having a Homepage like this is a game-changer, but it has to meet your needs and reality. If you could see the ones I help my clients build, you would be impressed by how different they are.
Another important detail is that your notes have to be organized using a system that works for you. Of course, I use the Timeline System, but regardless of which one you choose, there must be some sort of predictability to have a good dashboard. Without that, your dashboard will only be adding more friction to your life.
Obsidian is great, but learning is inherently hard
If you are looking into switching to Obsidian, maybe my journey can help you.
The very first video about Obsidian was published on my YouTube channel on March 14, 2023. What some of you may not know is that I had been using it for longer than that to help clients here and there.
However, that amount of time is nothing when compared to the muscle memory I have developed from using Evernote for every little thing in my life for 16 years. The problem with the new is that it is always unwelcoming. It’s not only the different way of doing things; it’s also the constant uncertainty about doing anything. And at that point, Obsidian was not only new to me, but there’s also the sheer number of settings and plugins making it feel so overwhelming.
To make matters worse, I decided to bring my YouTube audience along with me on that new journey. For a long time, I have had the idea of creating a vlog-style productivity series on my channel that would show how I organize life and work. I thought that learning Obsidian would be a great opportunity to try that, but it ended up creating unnecessary confusion, as it is challenging to film myself figuring out things happening in real time.
Back to my point. After so many trials and errors, I’m now much more comfortable with how Obsidian works. Some of the setups I came up with, like the homepage demonstrated in the video below, are now running for a considerable amount of time and working so well. Furthermore, my Timeline System has matured to the point where it allows me to seamlessly navigate my daily activities.
Don’t tell anyone, but because of all of that, I feel like recording many of my past videos again. Anyway, you are not here for this. Let’s go through my tips for switching to a new app.
Before that, a disclaimer is needed, right? The following is how I did things. It’s also based on the strategy I use to help my clients, but it may not be suitable for you. So think of the suggestions below as just that, suggestions.
From Evernote to Obsidian
First, I didn’t abandon Evernote. I knew how things worked there, which mad it my safe haven during the transition period.
With that in mind, the first actual homework was to learn the basics about the mysterious Obsidian. Because of my clients, I had already done part of that before. But now I needed to move a step further and see how things would work in real life. To accomplish that, I created the first of many local vaults on my Mac to work as a sandbox.
Once that was done, I copied, I repeat, copied, not moved, parts of my notes. In some ways, Obsidian is so similar to Evernote, but in others, like how files are stored, it’s an entirely different approach. However, it works in such a way that you can have as many vaults as you wish and easily delete the ones that didn’t work. As long as you are coping your files, you can consider the multiple vaults to be a process of prototyping and iterating.
Like I mentioned at the beginning of the article, there’s a universe of settings and plugins. I suggest avowing all plugins as you are getting to know your way around. As for the settings, try to look for the answers as you need them. For example, when you feel like you have to learn how to format text, go look for tutorials on how to do that.
As you get used to it, move some more parts of your system, but I would still think of what you are doing on the new app as in experimental mode. It will take a while for you to get used to the numerous new things that are still making you uneasy.
If you followed my progress on YouTube, you know that I was constantly changing my setup and being frustrated by all the new ways of doing things. And let’s not forget that I was doing all the above while still using Evernote. So much so that at a certain point, I had a good portion of my activities being managed with the help of both apps, and that was driving me crazy.
To make things even more miserable, Evernote decided to redesign its mobile app. Now, on top of learning a new system, I had to adapt to a new way of doing things on the app I was so familiar with.
It was a lot, but it was worth it. It felt like a final partnership with my old friend, Evernote. The new design and new ways to do things helped me eventually find a way to implement the Timeline System that had been brewing in my head for so many years. Yes, the Timeline System I use in Obsidian and in the Supernote came to be because of my struggles with Evernote.
With that settled, the next step was to replicate the system in Obsidian and start moving all my files. But I did it one notebook at a time. I would export an Evernote notebook, import it to Obsidian, organize all the mess, and, just as a last resort, keep the exported notebook as a backup. In case you are wondering, yes, I still have them in a backup drive.
Plugins
But we are not done just yet. As I have already mentioned several times, Obsidian is full of settings and plugins. My strategy here is the same as at the beginning of this process. Whenever I need something that Obsidian cannot do, I start looking for a plugin.
I try to stick with the ones that do one of a few things, but every so often that’s not possible. For example, the Tasks plugin is too much for my needs, but I couldn’t find a lighter alternative that would work for me. Templater and all its features is one that I’m avoiding, as the Auto Template Trigger does almost everything I require. But when it comes to having fun, it looks like that rule doesn’t apply. I love using and tweaking every detail possible on the Map plugin.
Which brings us to one of the reasons I switched to Obsidian. Evernote has been on a downward trend of removing features since version 10 was released. I thought for a moment that Bending Spoons was going to bring old features back, but they kept removing them.
Guess what, many of the removed features I used to love in Evernote exist on Obsidian as a setting or are available as a plugin. And in most cases, these are better variations of what existed on Evernote. And that makes me so full of joy! It’s like being in a parallel universe, where Evernote evolved to what Obsidian is today. Back to reality, I’m definitely happy. So happy!
In summary, what I’m trying to say is first, have a safe haven. Second, take your time. Really, take your time. This will be a long project. Third, you already have a lot on your plate, don’t create more problems for yourself. Go look for settings and plugins only when you genuinely need to fulfill a specific requirement.
Evernote's new PDF viewer is beautiful, but it's like a new skin over old problems
Perhaps it is time to remove Evernote from the toolbox of options I suggest to my clients.
Let’s start with the toolbar, which was beautifully redone, but as far as I can tell, there’s nothing new there. Actually, I’m missing an important detail — that, to be honest, I’m not sure if existed before or not.
Where is the undo button?

Using cmd+z (Mac) works fine, so the function exists. If they forgot about it, I hope they bring it back as soon as possible. If it wasn’t there, it seems to me that this was a missed opportunity to add it.
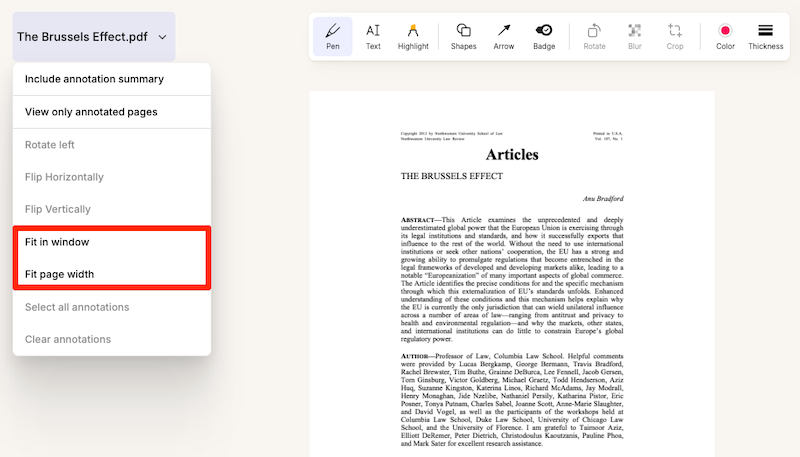
Meanwhile, the options Select all annotations and Clear annotations in the dropdown menu help circumvent that. But keep in mind that all means only those on the page being displayed.
By the way, I think the dropdown menu is a pleasing addition. The quick access to the Fit to page width option is a great start to making this a viable PDF reader. Which brings us to a problem so many of you have been complaining about to me over so many years.
It’s a view, not a reader
If the tool doesn’t remember the page we were on when we closed the PDF, it’s just a viewer, not a reader. And that is only one of the details that has been preventing me from using Evernote to read long documents. When reading and taking notes, I was used to relying on a PDF reader instead, but that came with an inconvenience. Evernote couldn’t be the place to store the PDFs.
It’s true that one can use the ‘open with’ option to open the PDF using another reader. But as far as I know, this is only available when using the desktop client, and we’ve been living in a mobile-first world for a long time now.
When the Files feature was added, I presumed that the final goal was to give us direct access to the files we keep in Evernote, but that never happened. Actually, even after all the time that has passed since it was released, it is still a half-backed feature causing more confusion than anything else.
Another step towards Obsidian
A long time ago, I moved all my PDFs to Google-Drive , but that ended up creating all sorts of inconveniences. Ironically, the idea was inspired by how Obsidian stores our files. Fast-forward to today, I gave up on the workarounds. I’m now reading my PDFs using whatever app I feel like, and, at the same time, the files are kept organized in Obsidian. Having the PDFs visible in the computer file structure creates a lot of freedom to do many things.
Bugs, bugs, and more bugs
Back to Evernote. Another nice touch in the dropdown menu is the Include annotation summary option, which in the past used to be a buried checkbook that many people didn’t even know was there.
This is a nice feature, which adds new pages to the beginning of the PDF, including all the annotations. Unfortunately, something is now broken. As illustrated by the video below, many of the PDFs I tried, created a messed up page. Furthermore, the summary now seams to only be visible in the note view. In the past, these notes were also visible in the PDF view mode.
There’s another inconvenience that makes Evernote challenging to use as a PDF reader. If you watched the video above, there’s an annoying flicker happening every time a page is turned. And I’m pretty sure this was not there before. On that same note, if we use the thumbnail to jump to a specific point in the document, that page opens in the middle of the text. And that’s precisely where starting at the top of the page would be a much better option.
I would like to end this post with a more optimistic view for the future of this feature and Evernote in general, but I’m not entirely convinced that that’s possible. The new Files feature is not the only one half-backed. Many of the new features are simply not useful as they are, and more often than not, they arrive with new bugs.
Frankly, I’m tired of trying to tell Evernote’s team that the ‘moving fast and breaking things’ strategy should not apply to something so important as our personal notes. This will deeply sadden me, but maybe it is also time to take Evernote out of the toolbox of options I recommend to my clients.
Se você está fazendo, trata-se de um Action Container
Em uma sessão recente com um dos meus clientes, notei que ele criou uma pasta no Obsidian que não estava dentro de nenhum dos Containers de Informação. Será que isto faz sentido?
Three everyday situations where the Timeline System in Obsidian can help you
What I love about the Timeline System is how simple it is to change the status of an activity by simply moving a note from one place to another.
A friend recently came up with a challenge. He told me he would like to know how I would use the Timeline System to organize and keep track of two everyday situations.
Bring it on, I said.
The first one was about a concert. He would like to know what I would do with the PDF tickets, that were incompatible with his phone wallet. Since this is still in progress, it should be in the Action Container.
I’m pretty sure there are other approaches, but this is how I would do it. In fact, I’ve done it before a few times, and it worked pretty well. I think of events like this as trip activities, even though it is happening in the city where I live. So, the Action Container would have a format similar to the one below.
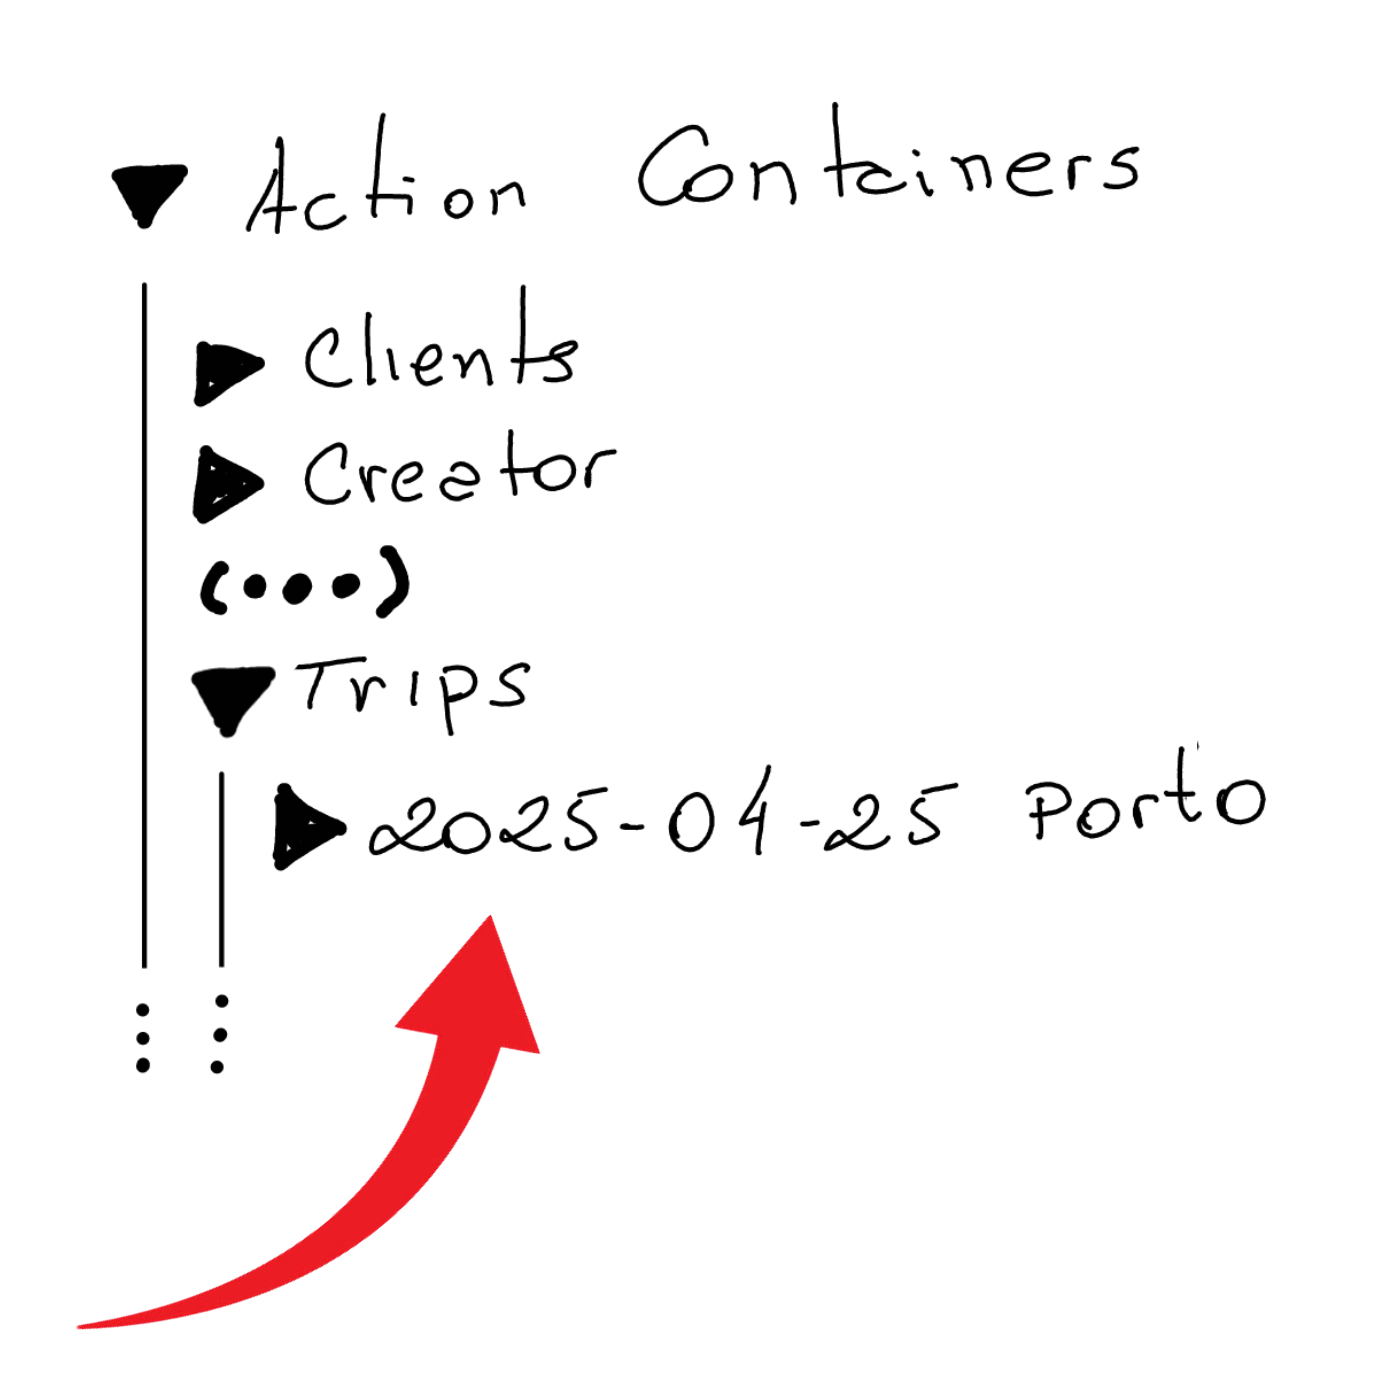
Where the folder ‘2025–04–25 Porto’ is the fake trip storing the concert tickets.
The other situation was an Amazon QR code he needed to show when returning a product. Since this one has no specific date, I’d simply keep it loose inside the Action Containers folder. Without a specific subfolder, it will be easier to find, and it will be an inconvenience working as a natural reminder every time I go to Obsidian to check my activities inside my Action Containers.
It’s a scenario very similar to what I’m currently doing (see video below) with the #Nadsat Glossary that I have to keep around to be able to read A Clockwork Orange.
What I love about the Timeline System is that all the above situations are notes that will eventually be moved to the Timeline container (folder). This will remove them from the list of activities in progress and, at the same time, keep them naturally organized in a place that I can go to retrieve information.
Another step towards repurposing my Obsidian vault
I have been testing the idea below for the past two months, and so far, everything is working wonderfully well.
I had to check the information before writing this post, but it’s been 16 years since I started using password managers. If you are not already using one, please share your secret with me. Given the huge number of passwords we have to deal with these days, they have become indispensable software. However, like many other apps, what was once a one-time fee became a subscription.
I don’t have any problem with paying, especially considering how they make our online presence safer while keeping passwords easy to manage. My issue is with losing control. Compared to a paper notebook kept in a drawer, it’s a much better solution, but our passwords are now sitting on a mysterious server somewhere in the world.
So, after testing the concept of a “digital cave” with many other items, I decided it was time to do the same with my passwords. But to accomplish that, I would need to find an app that keeps all the passwords in a single file, which I could then move to my vault in Obsidian. It would also need to have clients for all the existing platforms. And finally, it would be preferable if it were Open Source.
KeePass checks all the boxes above, and as you can see in the video below, I created the database inside in my Timeline and copied about 20 passwords to test the idea.
I’ve been playing with this configuration for a couple of months and since I’ve encountered no problems, I’m now looking for a way to import the remaining passwords.
If you’d like to try it too, watch the video. And if you know any other software that would also check all the boxes, please let me know.
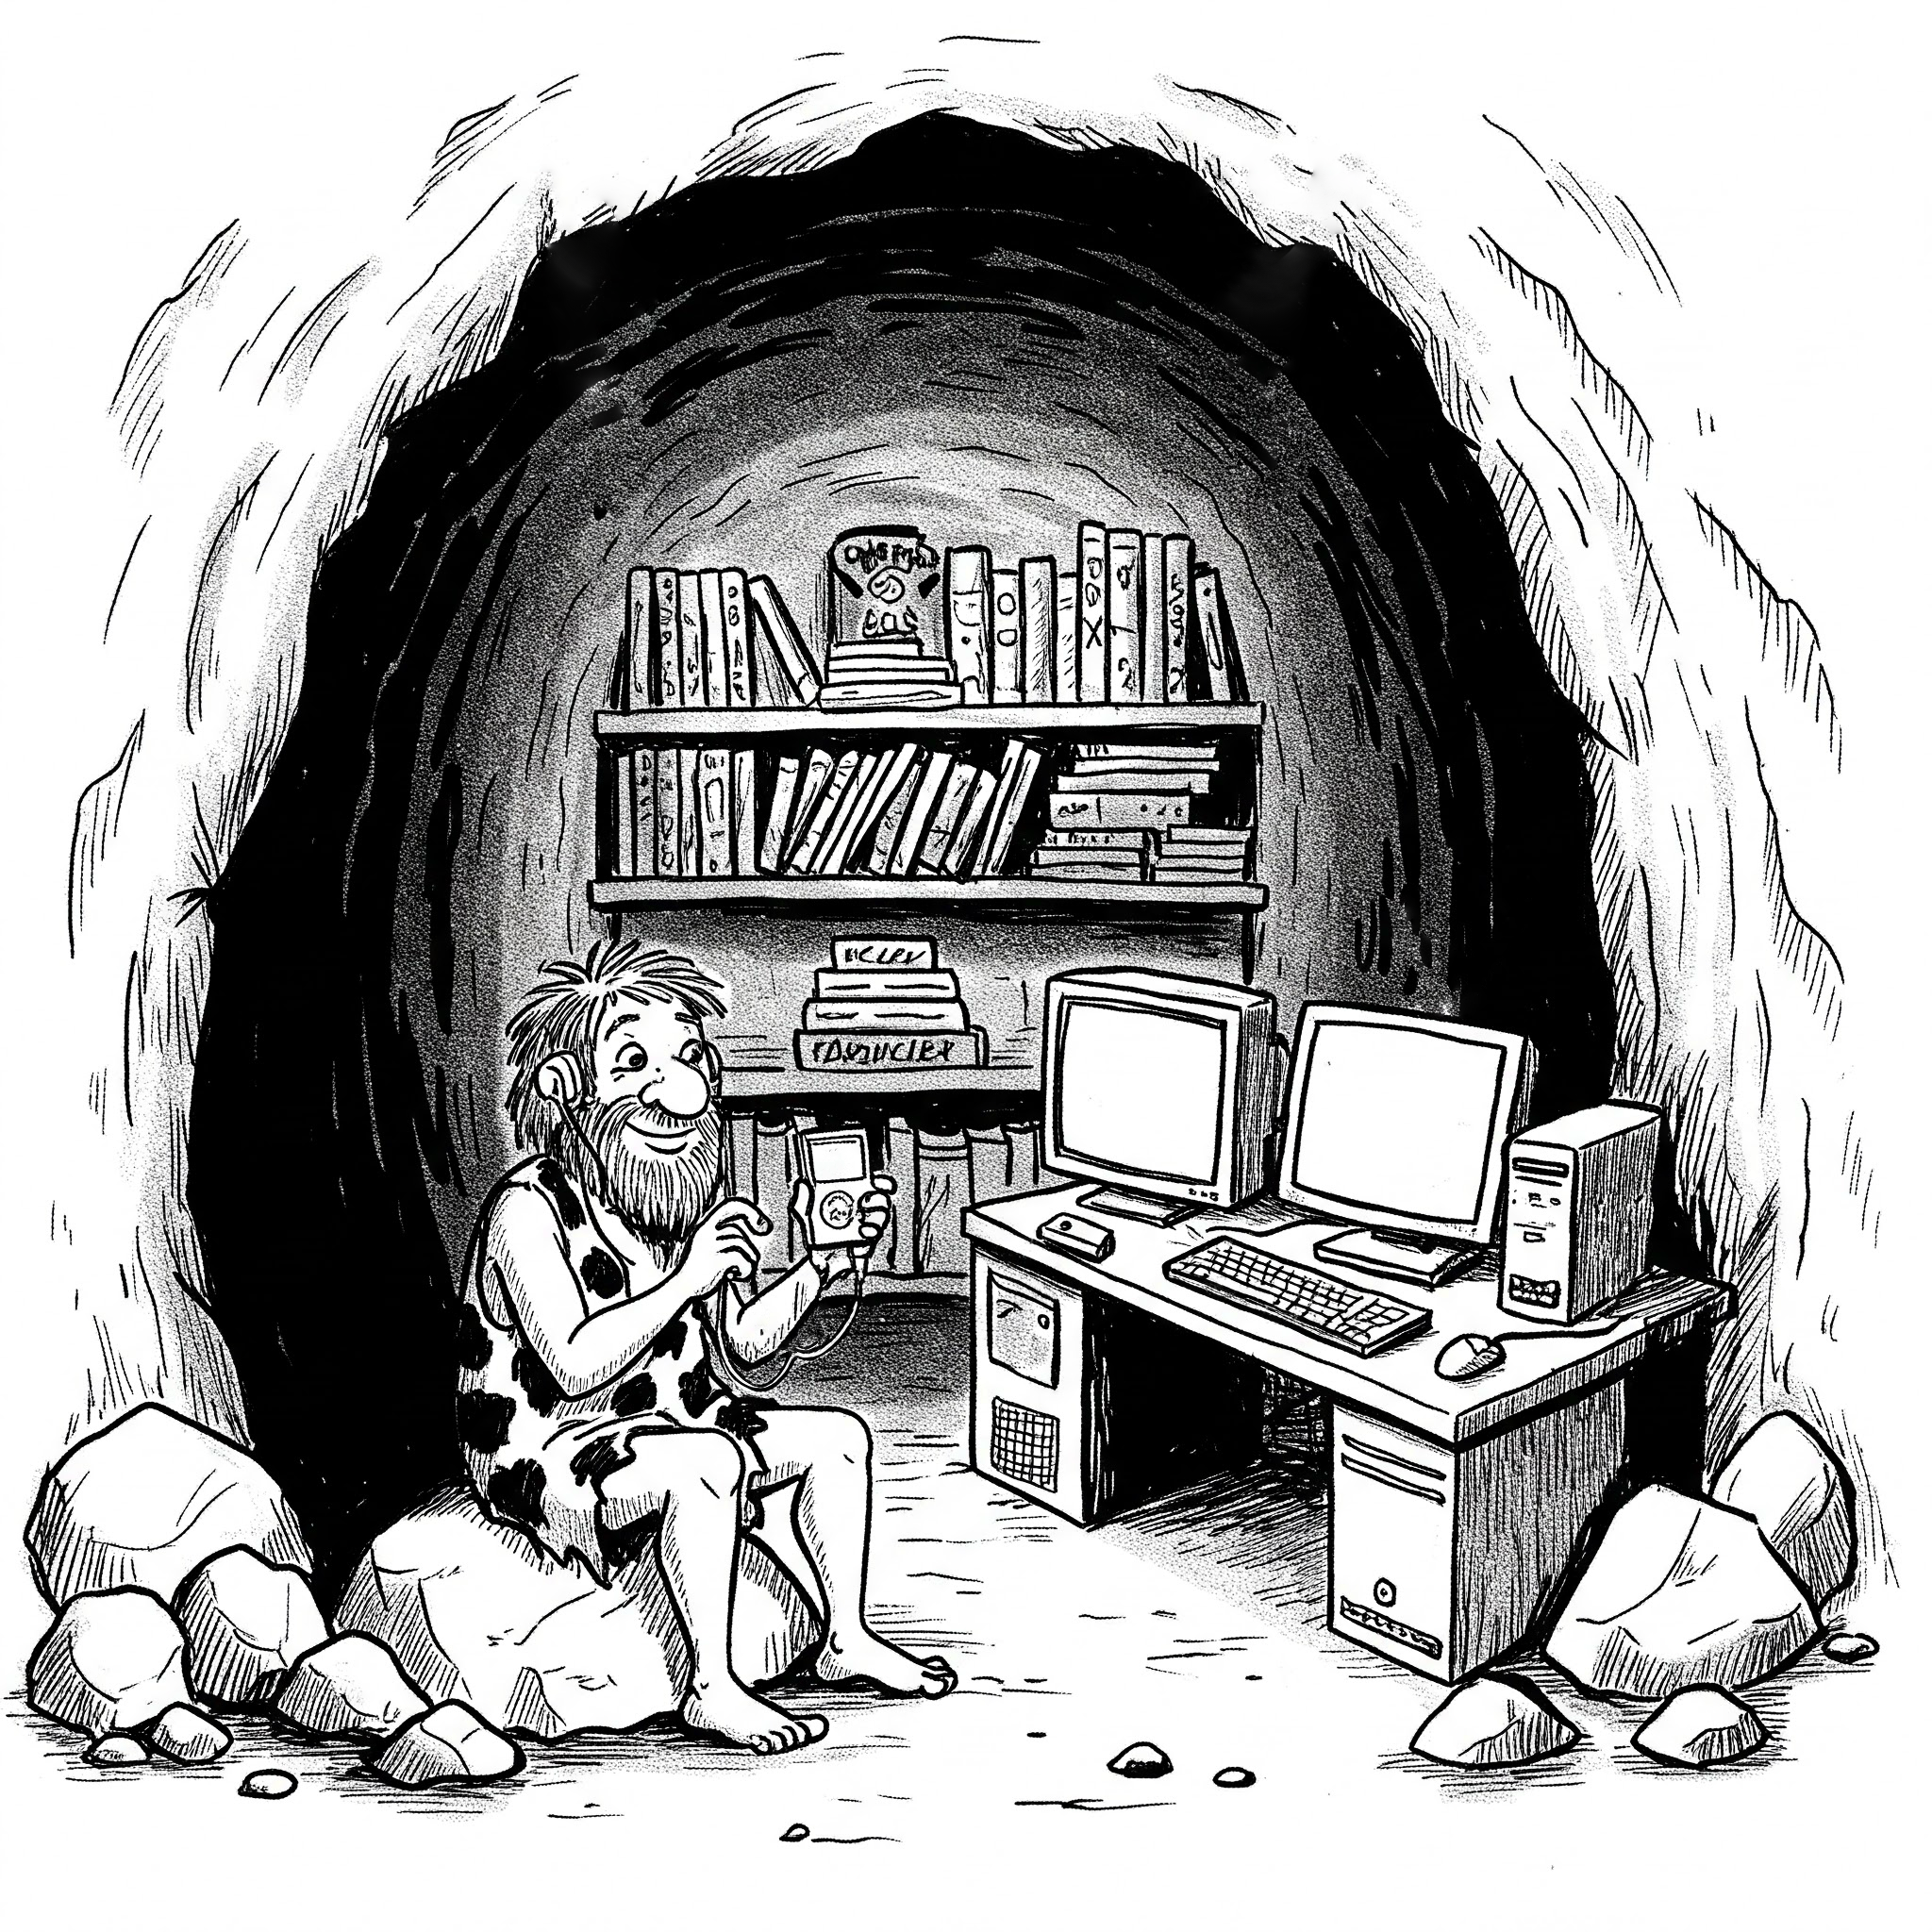
Projeto Homem das Cavernas Digital
en: The Digital Caveman project
O projeto Home das Cavernas Digital—que venho mencionado em alguns vídeos recentes—é uma ideia que surgiu naturalmente. Meu plano não é abandonar a tecnologia, nem simplificar por simplificar. Adoro e pretendo manter todas as comodidades que a vida moderna nos oferece, mas não há razão para sempre usarmos empresas que estão no outro lado do planeta para armazenar e gerir nossa vida digital. É inseguro em muitos aspectos.
Não sei exatamente quando isto teve início, mas é crescente em mim a necessidade de voltar a ter controle sobre o meu conteúdo digital. Olhando para trás, provavelmente a faísca inicial teve origem no iPod de quinta geração que tenho e uso até hoje. Depois veio o Obsidian que me dá acesso irrestrito às pastas e dados que estão no computador. Aliás, foi esta característica dele que serviu de inspiração para voltar a guardar as minhas fotos localmente em pastas, como uma forma de backup.
Coincidentemente, enquanto escrevo isto, a Amazon decidiu que a partir de 26 de fevereiro de 2025, não será mais possível fazer o download para o computador de livros em formato Kindle adquiridos por nós. Não houve alteração nenhuma no que se refere a baixar e ler os livros no seu Kindle, mas é impossível saber o que a empresa mudará no futuro. Afinal, já não basta bloquear as cópias com DRM, é preciso restringir ainda mais o acesso ao que supostamente é nosso. Uma coisa é pagar por streaming como o Spotify, outra coisa completamente diferente é comprar itens, mesmo que digitais.
De volta ao meu projeto. Quando criei o Timeline System e passei a utilizá-lo no Obsidian, comecei a imaginar um cenário onde eu teria todos os meus dados em pastas locais.
Depois de alguns testes, notei que é algo perfeitamente possível e atingível se for feito gradualmente. Além das fotos, venho construído uma réplica no computador de diversos locais salvos no Google Maps. Para isto, uso o plugin de Maps do Obsidian. Se algum dia o improvável acontecer e o Google deixar de oferecer o Maps gratuitamente ou simplesmente decidir que o produto não faz sentido, não perderei as minhas memórias de viagem.
Até o momento tenho tido sucesso em todas as minhas empreitadas. Por exemplo, recentemente tenho explorando a possibilidade de usar um gerenciador de senhas que com o banco de dados armazenado localmente no meu computador. Como já tenho as pastas do Obsidian sendo sincronizadas e com backup sendo feito em dois pontos da cidade, nada mais natural do que armazenar o banco de dados lá também. A propósito, dentro do container Timeline.
Há muito caminho a ser trilhado ainda, mas já vislumbro a minha migração para computadores usando Linux como o último estágio desta aventura. Caso queira embarcar nesta jornada, será muito bem-vindo.
Sei que isto não é para todo. Em realidade parece ser algo que apenas uma minoria entenderá e uma minoria da minoria tentará colocar em prática. É uma pena porque algumas comodidades modernas tem um preço muito alto e no limite pode significar que seus filhos não terão acesso a conteúdos que servirão de belas lembranças para eles depois que você se for.
The vision I have for my Obsidian Vault needs a carefully planned explanation
I am delighted to see that the pieces of my Obsidian setup are starting to come together in this organic way. It seems like as I make small changes here and there, my progress gets stronger. In other words, the more I move forward, the less friction there is.
I’m doing my best to document this journey on YouTube and on my site, but the more it evolves, the more this idea that it needs a carefully planned explanation grows on me. I’m still halfway through writing my current book, but I’m already feeling the desire to write another one about how I’m materializing this vision I have for my Obsidian Vault.
And, speaking of the current book, it is taking its toll on me because I chose to write in English. I don’t regret my decision, but it is exhausting to think and formulate ideas in a foreign language.
Similar to my progress with Obsidian, my writing is getting more and more steam as I move forward, but that doesn’t change the fact that it is taking me much longer than usual to finish it. If I were writing it in Portuguese, it would likely already be published.
Well, I will get there eventually.
Have a lovely week, Vlad.
Obsidian as a writing hub
Scrivener and LanguageTool are remarkable tools that I use all the time, but they don’t have an Android App. Luckily, Obsidian works as an elegant bridge that has clients for multiple platforms.
Please allow me to begin by explaining the situation. I’m a Mac user who switched from the iPhone to Android many years ago and have no intention or desire to go back.
That said, I sometimes come across great writing tools like Scrivener and LanguageTool that don’t have an Android App. Thankfully, Obsidian is an important part of my writing kit and has clients for multiple platform. This is the story of how I use it as my writing hub.
Scrivener is where I’ve been writing my books since 2012. I don’t know how others create, but in my case, I usually start by writing down ideas as they come to mind. When there’s enough content and a lot of mess, it’s time to organize the text, and that’s probably my favorite thing about Scrivener. Coping and pasting is harmless, since the draft file has no formatted text, and it is also extremely easy to rearrange chapters by simply dragging them around.
Another crucial aspect of writing is grammar. For a non-native speaker like myself, a little help with synonyms and sentence construction is very welcome. That’s where LanguageTool shines. It feels as if I have an English teacher constantly suggesting changes to improve the text.
Don’t ask me why, but Scrivener never added support to LanguageTool, despite the existence of an API. So, even when using my Mac to write, I can’t benefit from both of them working together. And when I’m away from my computer, things become even harder because none of them have an Android App. That even affects the Supernote, as it is also an Android under the hood.
Thankfully, there is a way to connect all of these seemingly incompatible pieces. Several months ago, I shared a workaround for using Scrivener’s sync feature to have access to your book’s draft as Markdown files in Obsidian. You can learn ho to do it, by watching the video below.
Yesterday, you learned about another part of the puzzle. There is a LanguageTool plugin for Obsidian that uses the same API Scrivener could be using to make writers' lives more comfortable.
By combining both methods — synchronizing the book with Obsidian and using the LanguageTool plugin — we can create the perfect solution to use the spell checker when writing on a Mac or using an Android phone. Which also includes the Supernote. Isn’t that cool?
However, that is not all the writing I do in Obsidian. This article, for example, started as an idea in my Creator Action Container. The note was born there when I was riding the subway and wanted to write some ideas and drafts of a few paragraphs.
I kept working on it the next day, but this time I used Obsidian on my computer. In both cases, LanguageTool was there helping me. When it was finished, I moved it from the Action Container to the website folder to then make it available online, where you are reading it now.
If you’d like to learn more about all of these interconnected folders, please watch the video below.
My new site took a selfie
These represent all the page connections through links or tags within my new website thus far.
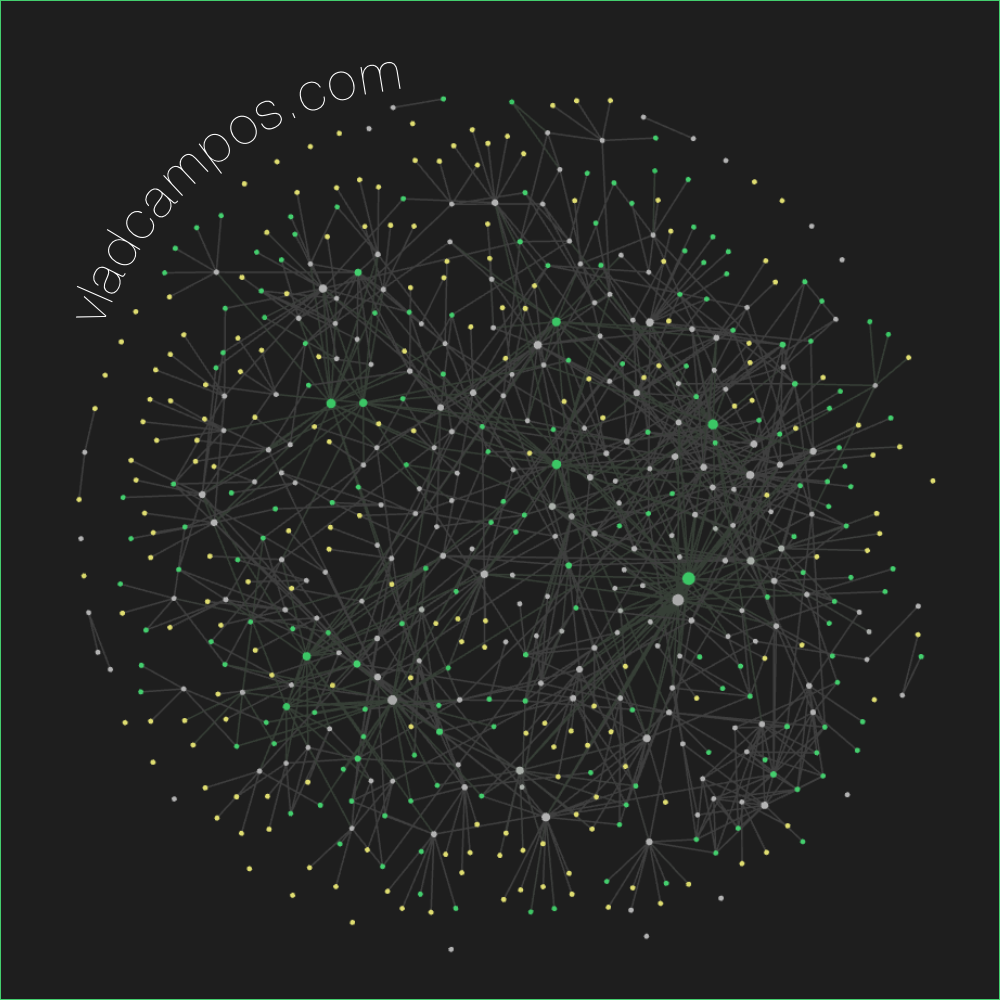 Create using Obsidian Graph View
I still have a lot of work to do, but this first version represents the initial stages of my vision for a website that is both a learning center and a blog.
Obsidian Publish is far from perfect, and many of the issues I’ve complained about in the past, are still present. However, things changed on my side. I have gained experience, acquired new technical skills, and developed a deeper understanding of topics related to online presence.
Maybe all that helped me understand what my vision was. That’s probably why I now see Obsidian Publish as an appealing option.
A few thoughts on using the Obsidian app on the Supernote.
After a few days with the new Obsidian vault I set up for the Supernote, it’s time to discuss some other little tweaks I made and issues I experienced.
I still haven’t found a solution for the context menus that pop up when I hover the pen over clickable items. In the video below, you can see it happening on Obsidian, but it’s also affecting Syncthing.
At first, I thought it was linked to sideloaded apps, but it’s not happening to all the apps I installed, and I can see it happening when I’m using Obsidian on my computer. In other words, it appears to be a normal behavior found in certain apps, and I’ll have to investigate further to resolve this issue.
Battery
The battery is also draining faster than usual. It’s not something crazy fast, but it was bothering me, so I decided to try a different configuration. Syncthing-Fork has a setting to change the the number of synchronizations per day.
I hope it will improve the battery situation. The drawback is that I’ll have to pay more attention to the synchronization status, but I am fine with that.
Supernote Cloud & Tasks
Since we’re talking about sync, I went back to the Supernote cloud. In my opinion, it’s a better option, since I can see and manipulate files seamlessly on the phone and computer companion apps, where, by the way, I can also manage tasks.
I love how the Tasks app works seamlessly with notes, but there’s one thing that’s still driving me crazy. As you already know, I see Inboxes as a huge waste of time, so when a system has a folder like that the user cannot remove, I just ignore it. However, the Supernote forces me to use it.
On the Mac or Android companion apps, I can open a specific list and create takes there, but that’s still not possible to do that when creating tasks on notes.
Syncthing
Back to the sync topic, the one thing the Supernote cloud was not as efficient as Google Drive, was giving me quick access to my sketches exported to JPG or PNG. But, as I show in the video below, I’m now doing this using Syncthing.
I am still working on improving my workflow to efficiently combine what the Supernote and Obsidian do best, but I am already thrilled with what I have accomplished so far.
After installing Obsidian on my Supernote I can clearly see that the battery it is draining faster. It’s not substantial, like going down in a few hours or days, but it’s definitely draining a little faster. It could also be because I’ve been trying and testing so many new things lately.
There are some settings that I can change on Syncthing to improve the situation, but before I go that route, I’ll give it a few weeks under normal use conditions to see how it performs.
Stay tuned. I will keep you updated.