How to install Android apps on a Supernote using a Mac
🚨 UPDATE Jan 9, 2026.
There’s a much easier way to do this. Click here to learn how.
Before we start, I have some disclaimers. I am not a developer, and I have only a rough understanding of what is actually happening when following the steps below. I’m simply sharing what I learned researching online. It worked for me, but you should always do your research.
As for the Android apps, please be careful with what you are installing. Apps downloaded from the Internet, known as APKs, are not being checked by the Google Play Store.
So, if you decide to follow the steps below, know that you are doing it at your own risk. And make sure you have a backup of your Supernote before starting.
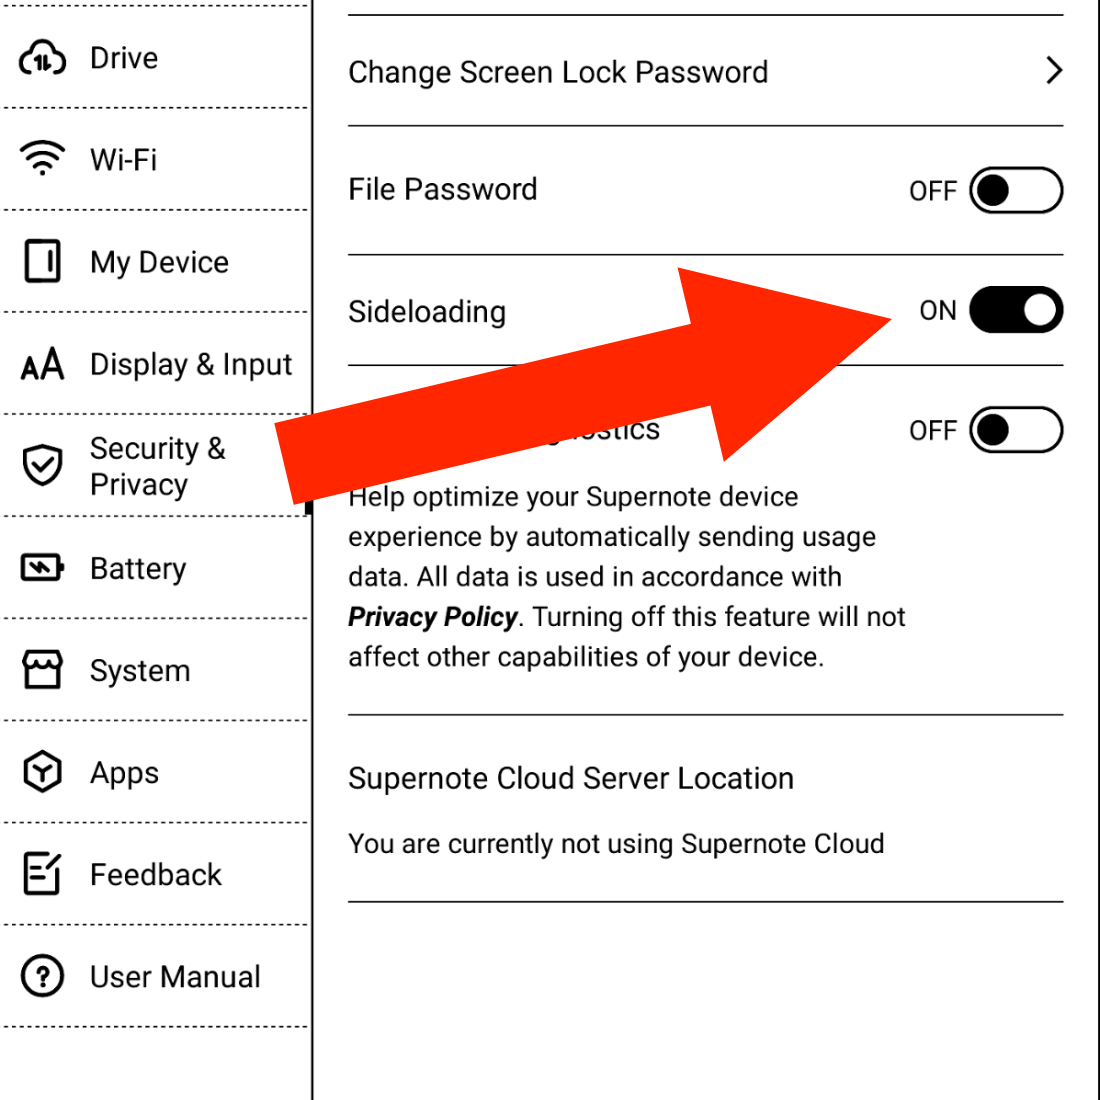
The first step is to prepare the Supernote to receive Android apps. Go to Settings, then Security & Privacy, and then turn on Sidloading. This means that you are allowing the Supernote to accept the installation of Android apps.

Next, we have to make sure the Supernote can connect to the Mac. Under the hood, the Supernote is an Android device, so we will need to install an app on the Mac to allow both of them to talk to each other. This step was a bit of a pain for me. After trying different options, MacDroid was the one that worked. If that does not work for you, please search for other options on Google and try them.
I suggest using the Supernote USB cable, as not all USB cables are the same, technically speaking.
Now we need to get the Android apps ready. Obsidian offers the APK on its website, which, I think, is an excellent practice, as they are the company behind the app.
I am also using Syncthing-Fork, which I downloaded from the developer’s GitHub page. However, if you are using Obsidian Sync, you don’t need Syncthing. Please download either one or both and place them aside for now.
Syncthing-Fork
- 2025-12-20 (EN): Back to Obsidian Sync: my first thoughts
- 2025-12-18 (EN): Simplifying my new Obsidian Sync strategy
- 2025-12-17 (PT): O drama do Syncthing e minha estratégia com o Obsidian Sync
- 2025-12-16 (EN): Syncthing drama and my new Obsidian Sync strategy
- 2025-05-23 (EN): What is Syncthing-Fork
- 2024-12-15 (EN): How to set the number of synchronizations per day on Syncthing-Fork
Next, download and install Homebrew. You’ll find the instructions on their website. Just follow the steps. This app is needed to install the next app on your Mac.
Now download the Android SDK Platform-Tools, which is what will actually talk to the Supernote. To install it, you’ll have to use a command on the Terminal.
To open the Mac Terminal, hold the Command key and press the Space Bar. Type Terminal in the search box and click to open the Terminal. In the Terminal window, write the following code:
brew install android-platform-tools
When you hit Enter, Homebrew will install the Android SDK Platform-Tools on your computer. You’ll see some code scrolling on the screen and then a message that says it was installed successfully.
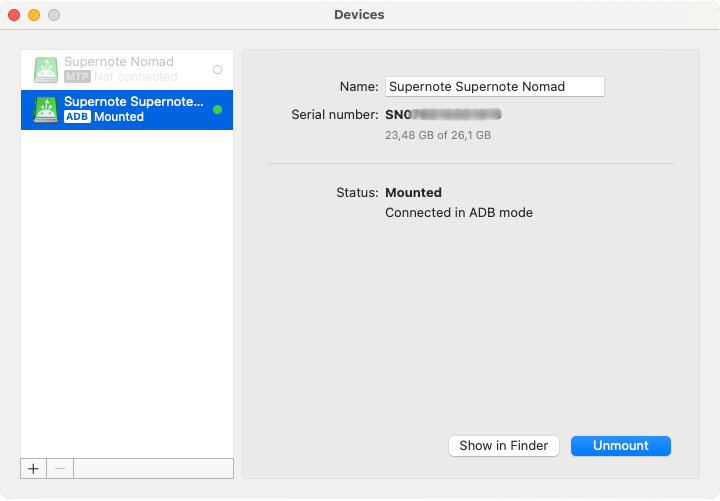
Now it’s time to connect your Supernote to the computer, and make sure MacDroid can see it as a device.

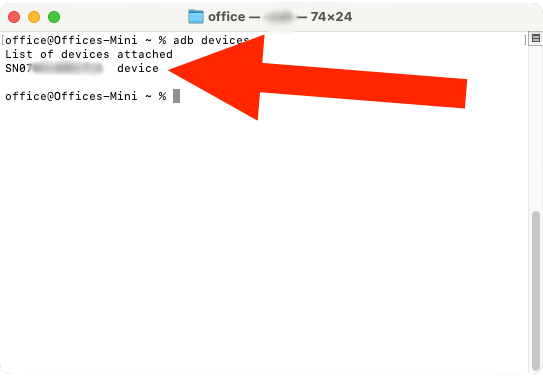
If you get a screen like the one above, go back to the Mac Terminal and type the code below to make sure the system is seeing it:
adb devices
You should get a message similar to the one below.

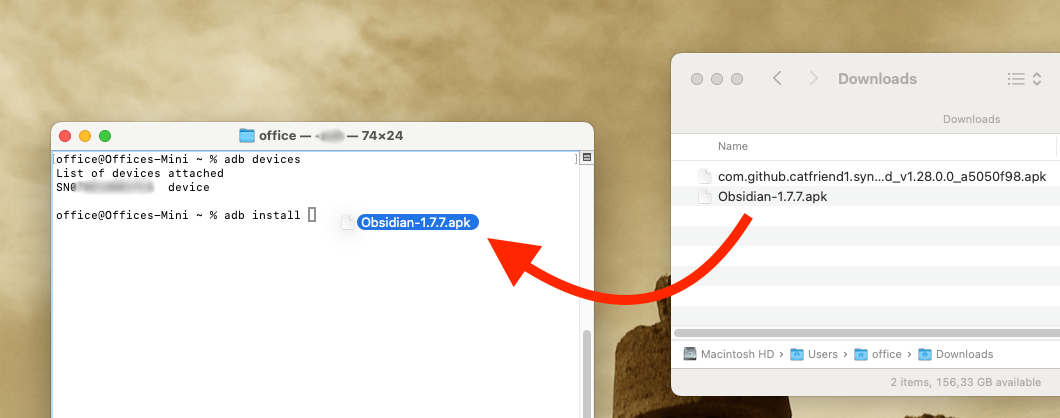
Finally, it’s time to install the Obsidian APK (Android file). Go back to the Mac Terminal and type adb install, followed by the path to the APK file on your computer. In my case, it looks like this:
adb install /Users/office/Downloads/Obsidian-1.7.7.apk
Alternatively, you can type adb install, hit space, and using the mouse, click and drag the APK file to the front of the command. That will create the path for you. Hit Enter and wait until you see the success message.

That’s it. To install other apps, repeat the adb install command, adding the path to the app on your computer.
Please use my affiliate link if you decide to buy a Supernote or any accessory. Thank you!
If you are curious to see how Obsidian performs on the Supernote, I invite you to watch the video below.
Supernote
- 2026-01-09 (EN): Supernote app installation with Android Sideloader | 2026 update—the easy way!
- 2026-01-03 (EN): The simple feature that would make the Supernote much better (at least for me)
- 2025-12-24 (EN): It’s 15°C, but with no wind, a bit of heat from the …
- 2025-09-10 (EN): I’m super impressed by the new #Supernote digest …
- 2025-08-05 (EN): Moving all the online services I use to the EU will …
- 2025-07-23 (EN): I’m trying to visualize a project I’ve been brewing for a …